- From the list, view Click on Children
- Double click on the child’s name to enter their record
- Click on the Enrollment tab
Setting up the enrolment start date for the new child:
Once the system receives a status update to enrolled, the enrolment start date will be moved to the enrolment page.

If a child has left your services but is now returning, follow the below steps.
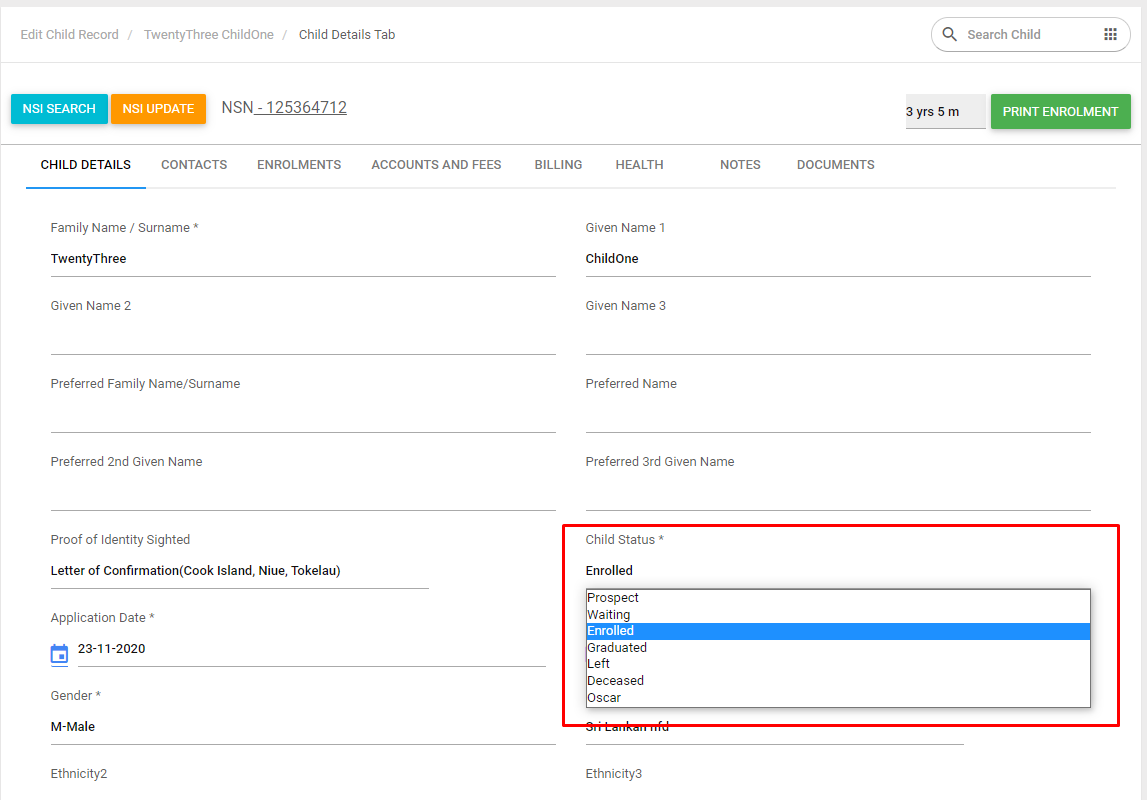
4. From the child’s details page update the status to enrolled. This will display a Re-enrol button. Click on re-enrol
![]() The system will take you to the new enrolment section automatically.
The system will take you to the new enrolment section automatically.
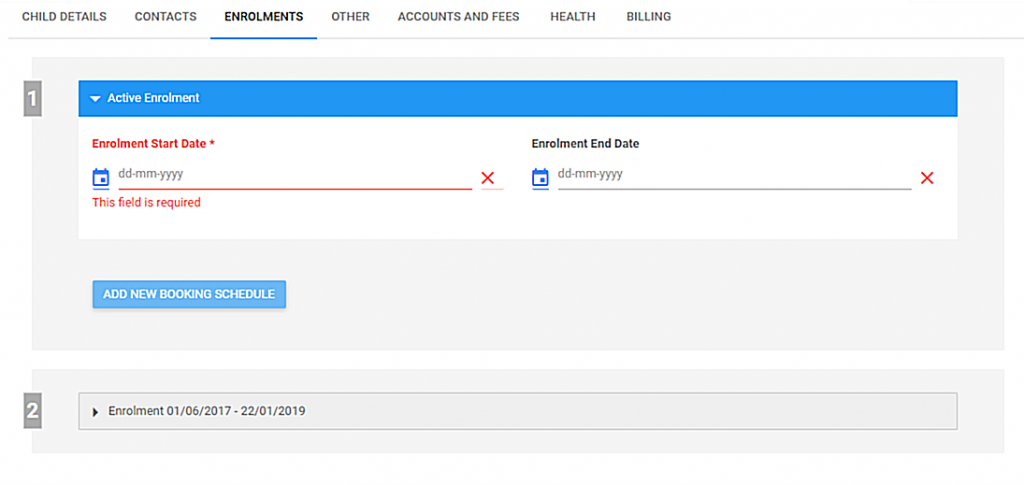
5. There must be a past end date on the Previous enrolment, the system will not allow you to enrol otherwise
The enrolment start date can be modified if you have already marked attendances after this date. You will need to remove all attendances after this date and then re-enter attendances
Ending an Enrolment:
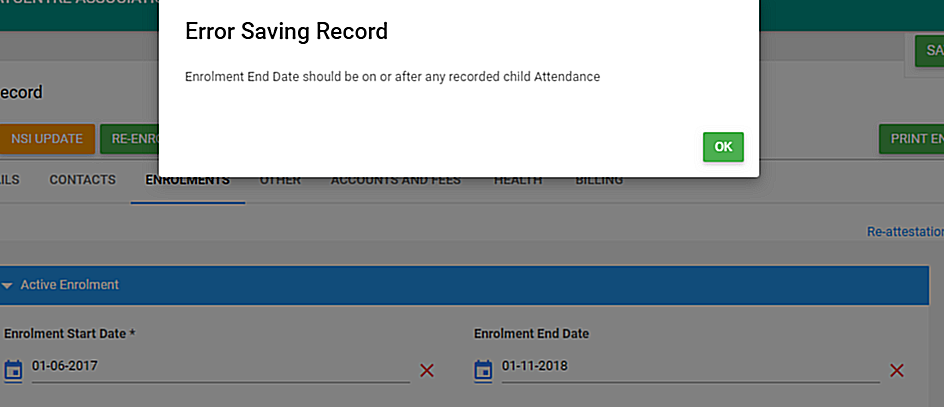
Ensure there are saved attendances after your intended end date.
- Click on the enrolment tab
- Enter your end date
- From the child details tab, Update the child status to left, graduate or any other items from that list
- The System won’t allow you to change the status to prospect or Waiting
- If you are starting the new enrolment by ending the previous, there is no need to update the status for a child
Adding a Booking Schedule
- From the list view Click on children to open the children table.
- Double click on the child’s name to enter their record.
- Click on the Enrolment tab (The child must have an active enrolment start date to enter a booking schedule or mark any attendances)
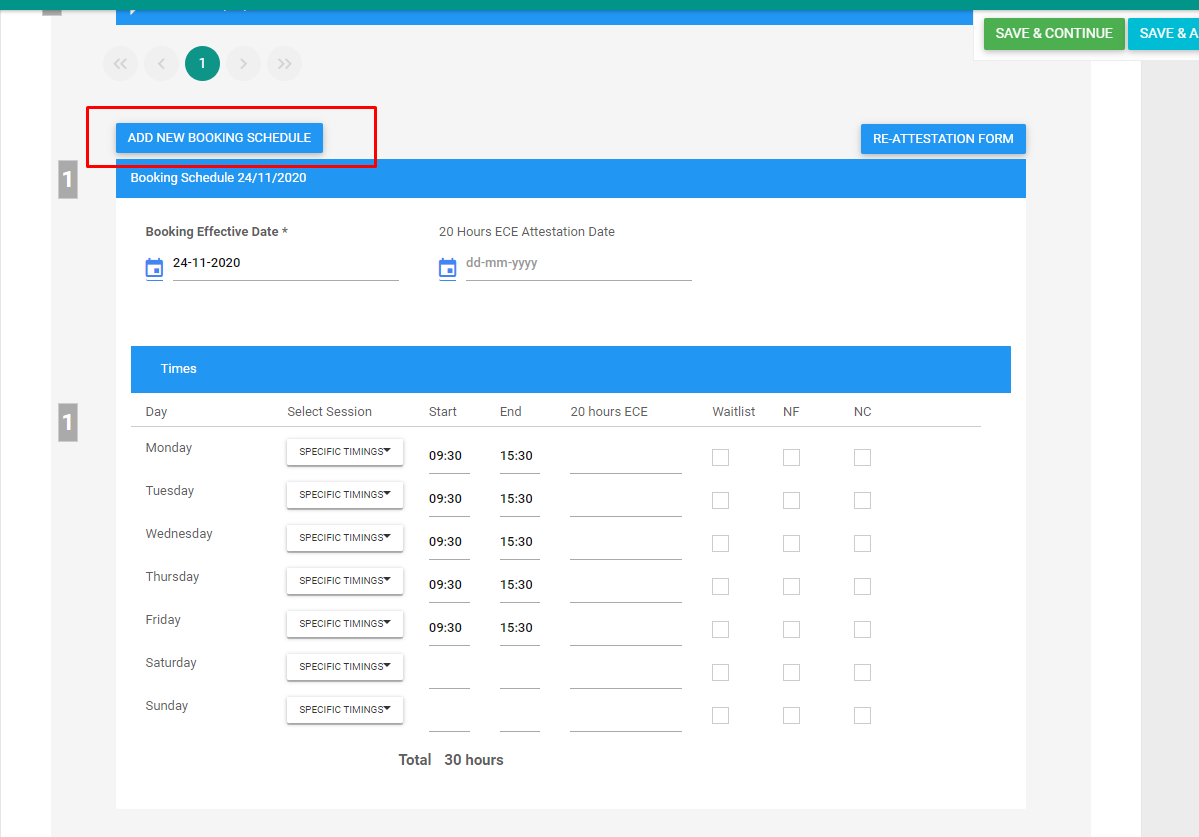
- Click on Add New Booking Schedule.
- The 20 hours ECE funding is the highest finding for a child from 36 to 60 months of age. A child needs to be between the age of 3 to 5 years to claim 20 Hours Free ECE funding.
A reminder in Juniorlogs will be displayed for children who turn 3 and qualify for funding. Centres are obliged to keep all relevant records to claim this funding.- Once the 20 hours ECE attestation date has been set, any time you create a new booking schedule, the attestation date must always be filled in.
- The attestation date should be on or after the booking effective date.
-
- 20 hours free attestation date is associated with the booking effective schedule. The reason for this is that you must have a current booking and time schedule which goes towards claiming the 20 hours free ECE hours
-
- The system doesn’t set attestation automatically and so the centre admin needs to get the 20 hours ECE attestation from
parents once the child has turned 3 years old. - The child should have an active time schedule before we can define 20 hours ECE funding.
- 20 hours ECE funding is not available for casual enrolments
- The system doesn’t set attestation automatically and so the centre admin needs to get the 20 hours ECE attestation from
-
- Hours claimed under 20 hours free ECE would be either equal or less than the time booked for each day
- A maximum of 6 hours per day can be claimed
-
- A maximum of 20 hours per week can be claimed
- The 20 hours Free ECE attestation date becomes compulsory once you have claimed funding under that scheme
- Set hours to nil or zero if the 20 hours funding is claimed from a different centre
-
- Max 20 hours funding can be claimed by a child per week. This can be claimed from one of the multiple centres
- It’s better to request families to claim 20 hours of funding from your centre just because it is a better rate and the child is entitled to it
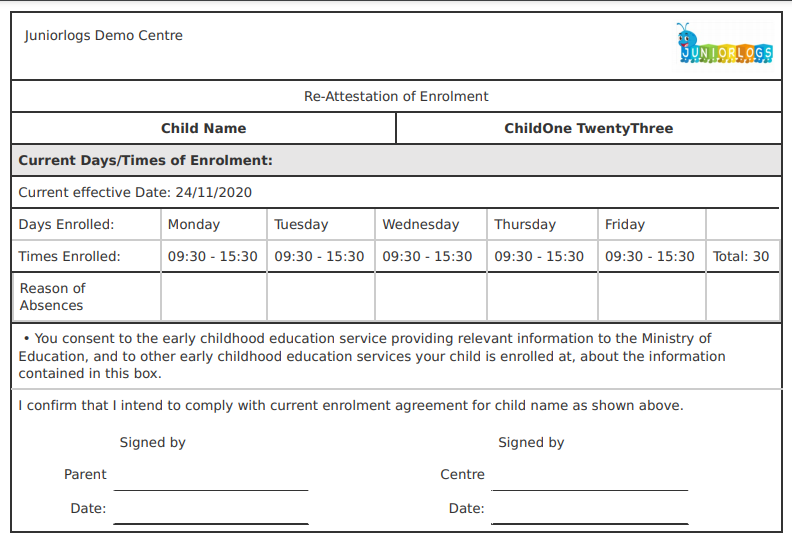
- Click on the Re-attestation form from the bookings schedule to download a form for re-attestation
