Contents
| Fees and Donations |
|---|
| Edit Centre – Financial Details |
| Edit Centre – Logo |
| Edit Centre – Customised Templates |
| Edit Centre – Invoice Settings |
|
| Invoices for a child |
| Viewing all invoices in your service |
|
Fees and Donations
Juniorlogs enables users to create centre specific fees such as daily meals, weekly nappies, monthly field trips or manual invoices and donations. All fees & donations are stored in a fees table in Juniorlogs.
This will enable users to add fees to a child when they register or during their course of enrolment.
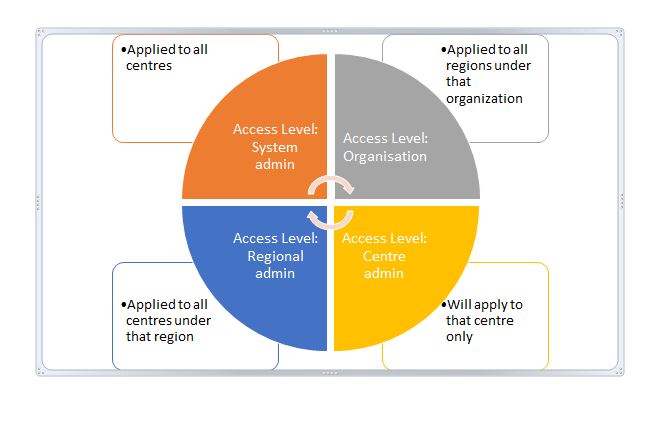
Fees and Donations will be accessible to the users depending on their access level.The chart below describes various levels of access available within Juniorlogs.
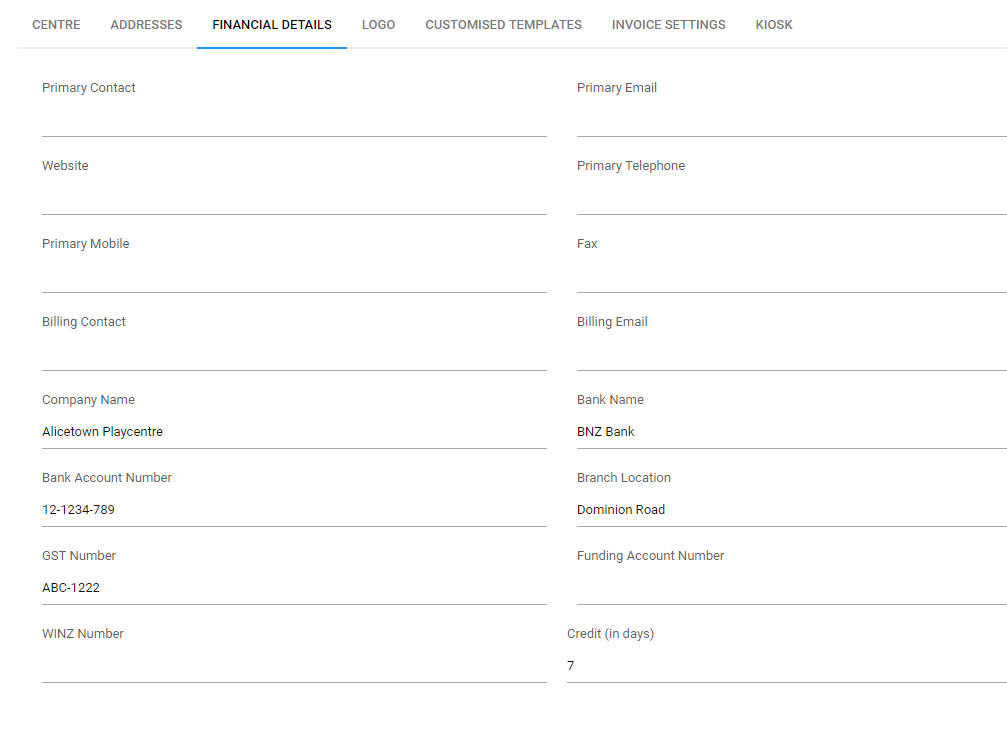
Edit Centre – Financial Details
In this tab, ensure that the following information has been added so as to make it reflect on your Invoice and Donation copies.
- Company Name
- Bank Name
- Bank Account Number
- Branch Location,
- GST Number
- Credit Terms
Edit Centre – Logo
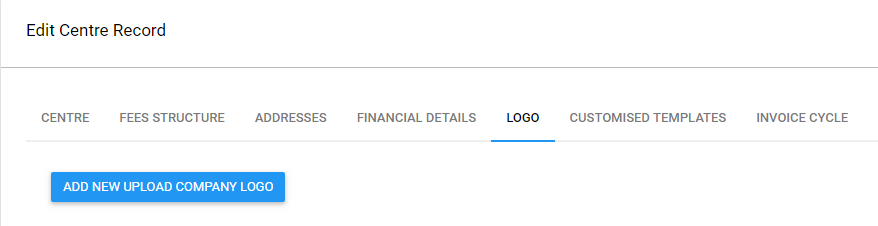
Ensure that the organisation logo has been added. Again, this will be reflected on your invoice/donation template.
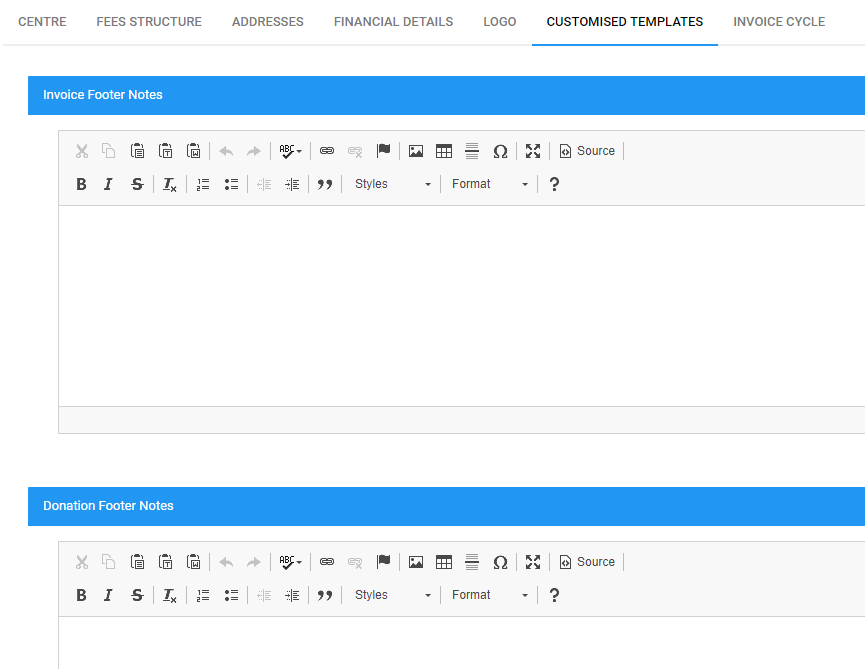
Edit Centre – Customised Templates
Any messages or footer notes that you would like the invoice/ donation receipts to display can be added under Customised templates. Adding notes to these sections is optional.
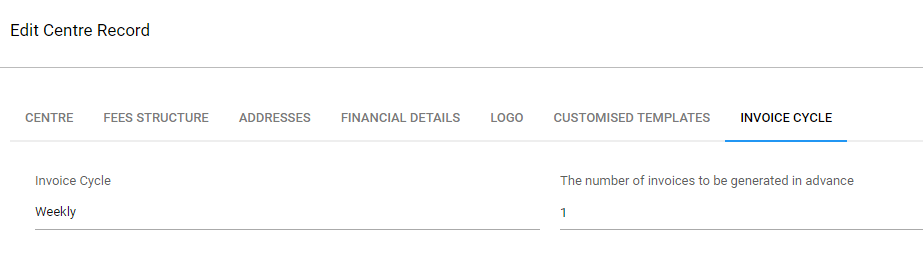
Edit Centre – Invoice Settings
This section allows you to specify the Invoice cycle, Invoice generation (auto/manual) and number of invoices to be generated in advance. To harness full automatic invoicing functions that the system has to offer, it is important to set this section correctly.
1. Adding fees & donations
Adding Fees
1. In the Settings menu, select Fees table.
List of existing fees will be displayed. Please note: All existing fees & donations can only be modified from the fees table. 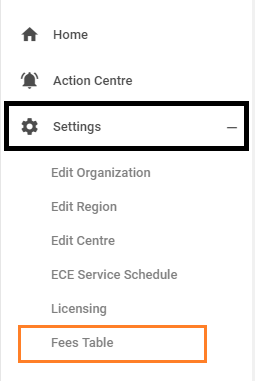
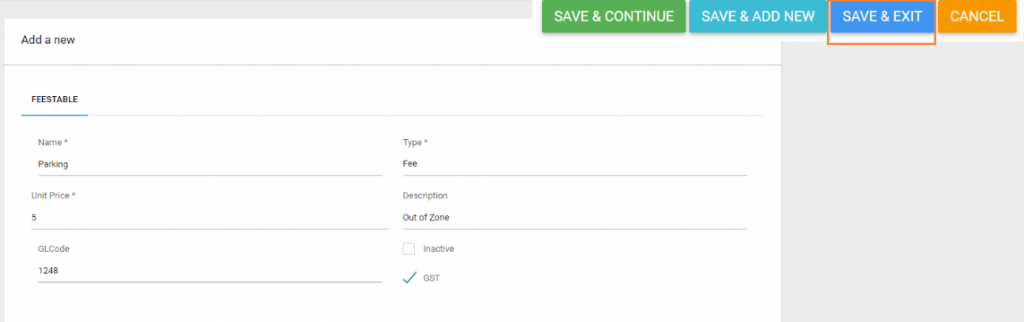
2. Click on green + person icon to the right of the table to add a new Fee
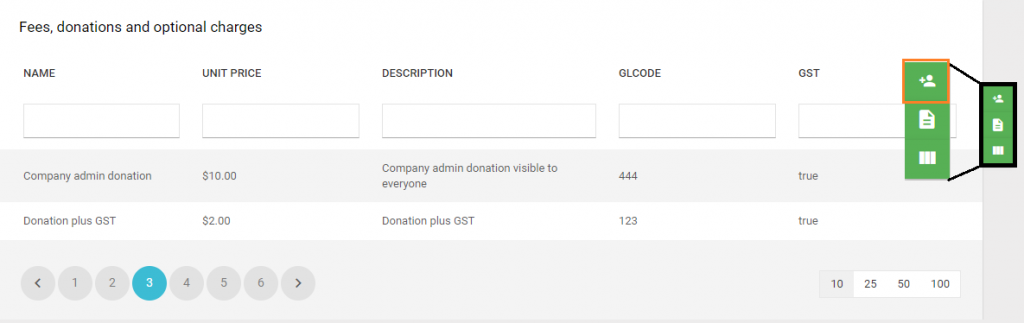
3. Fill in all the relevant fields then click Save & Exit.
Adding Donations
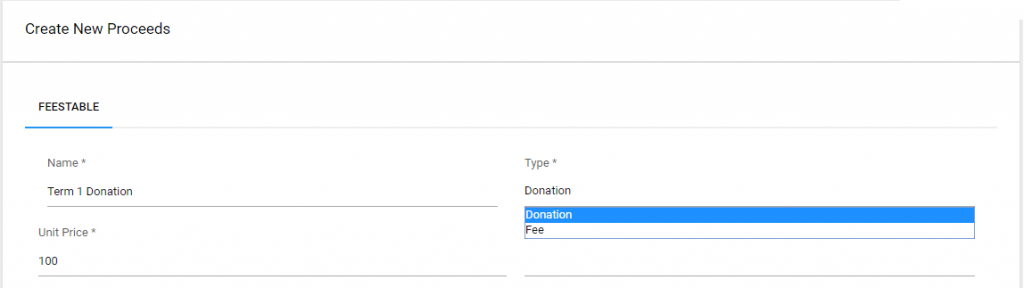
To add a Donation, follow the same steps, however, instead of Fee select Donation from the Type dropdown menu.
2. Applying fees to children
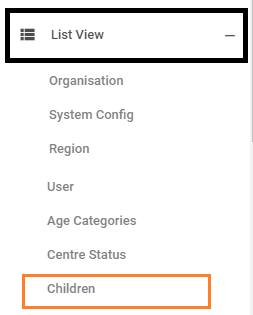
Navigate to Children section and double click on the child name from the table.
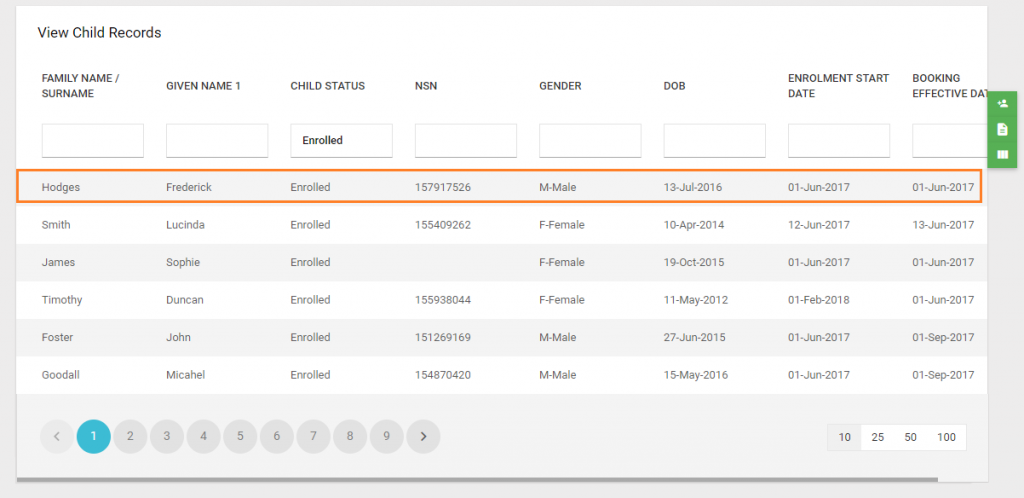
- Select Accounts and Fees There are 2 options to add to
- Add new Payee – Here you can keep a record of all payees involved in billing.
- Add new Fees – Fee selection available depending on what has been set up under the Fees Table (Settings).

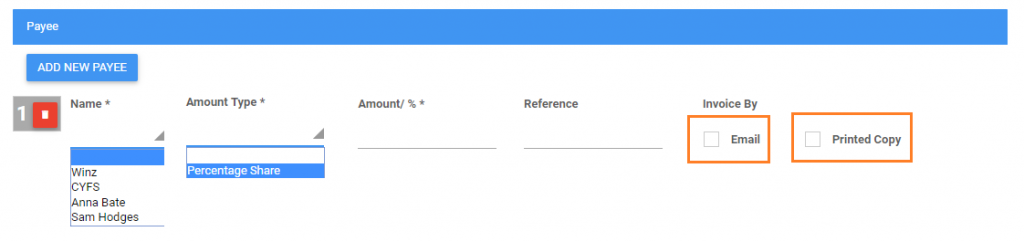
Adding a new payee
- From here you can add contacts or subsidiary payees in the Name
- By default, the system will display Winz, CYFS and all contacts related to this child. (To add more payees, users will need to add new contact relation under the contacts tab).
- You can setup custom arrangements by choosing Percentage Share & adding the % share amount in the Amount
- If the percentage for one payee has been set to 100%, adding a new payee will not be possible and the “ADD NEW PAYEE” button will be removed.
- The “ADD NEW PAYEE” button will show if the Percentage Share is a partial amount.
- Configure invoice option to Email or Printed Copy
- There must be at least one existing payee before any fees are added.
- You can add as many payees as they would like providing the percentage sums up to 100% in total.
Please note: All split percentages will create separate invoices.
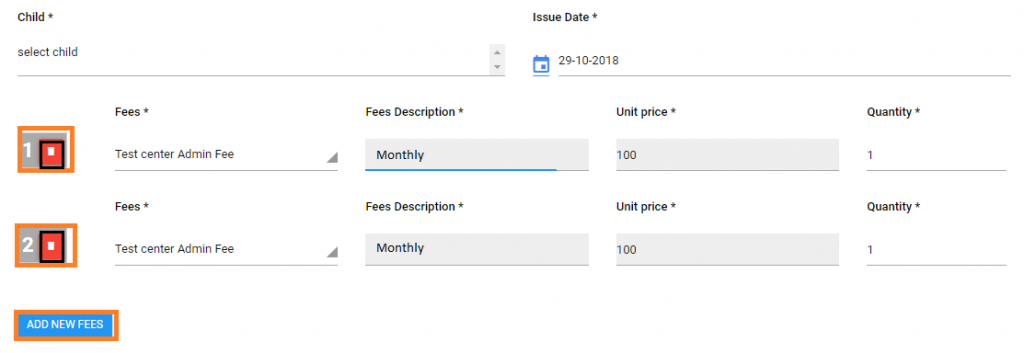
Adding fees
- When selecting fees from the list, unit price & fee description will automatically fill themselves with the information setup in the Fees table.
- You can add quantities, notes and any provided discounts in the following fields.
Please note: The total sum will not be shown in this window.

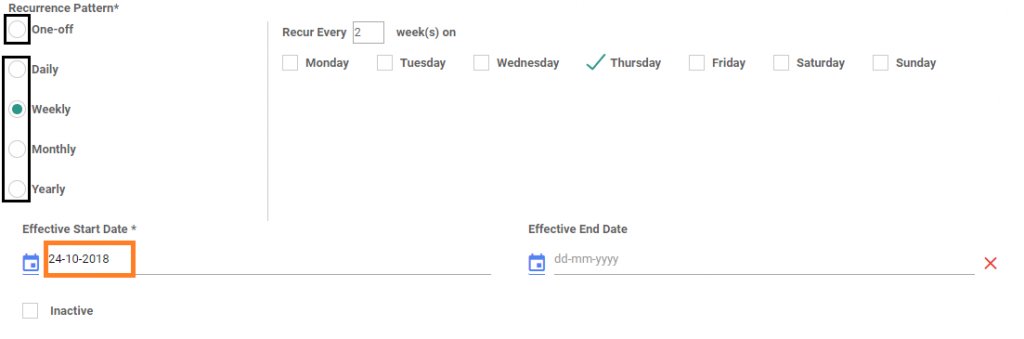
- Fees will be applied to a child with a reoccurrence pattern or a one-off payment.
(This will generate an automatic billing report for the invoice).
- Payees are required to pay & a statement will be kept, collecting fees that are due.
- Effective start date can be no earlier than the present day.
3. Adding donations
From Donations menu option
The donation will be added by selecting the Child name first followed by adding the donation type.
Individual donation from Children section

- Navigate to Children section and double click on a child name from the table.
- Select Billing tab
- Click Add New and select the type of donation you wish to add for this child
4. Adding bulk fees/donations to a group
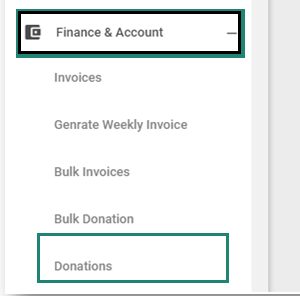
From the menu, under Finance & Account, select Bulk Invoices/ Bulk Donations.
Fill in the required fields and tick the check boxes of the children’s names whom you would like to add to a bulk set of fees/donation to.
- Add more line items by selecting Add new fees button.
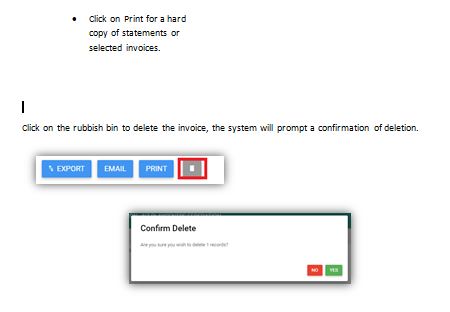
- To delete any unwanted line items, click on its corresponding red rubbish bin.
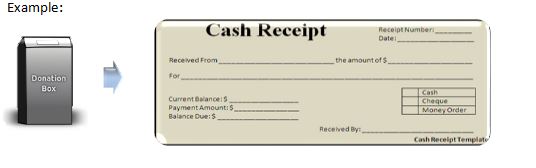
5. Issuing donation receipts
When collecting donations, the system enables the users to create donation receipts.
- Fees is applied to children and invoice is created. Parents are required to pay, and statement will be kept to collect fees due.
- When collecting donations, the system will generate donation receipts upon collections.
- Users can view all history & pending items from here.
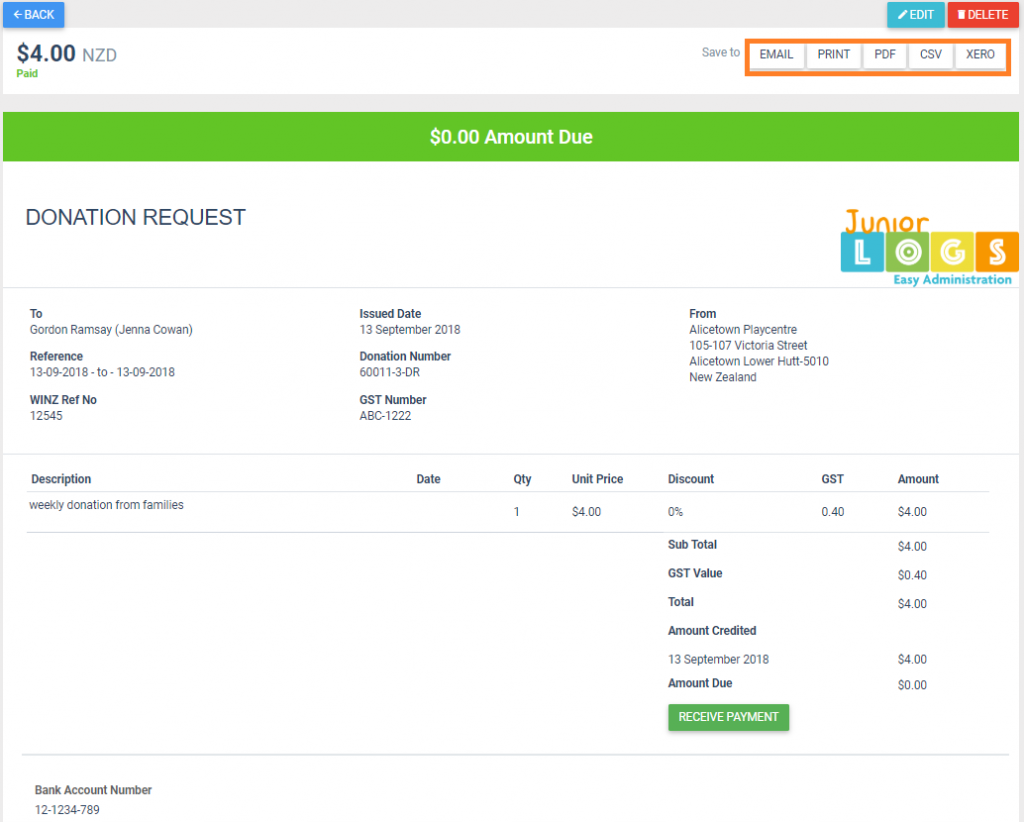
- Several options can be made to save a donation request.
- Email, Print, PDF, download as a CSV file and send to Xero (Under Development).
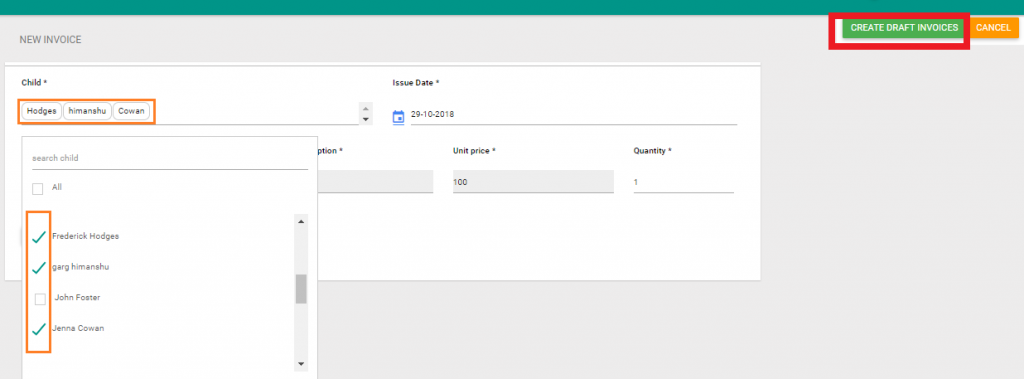
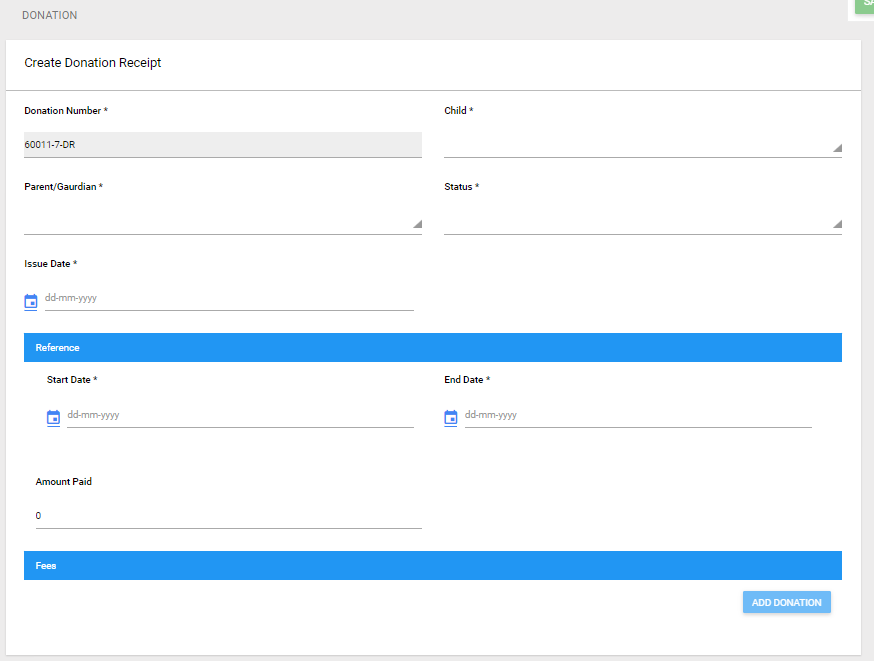
- Users have 2 options to create instant donation receipts
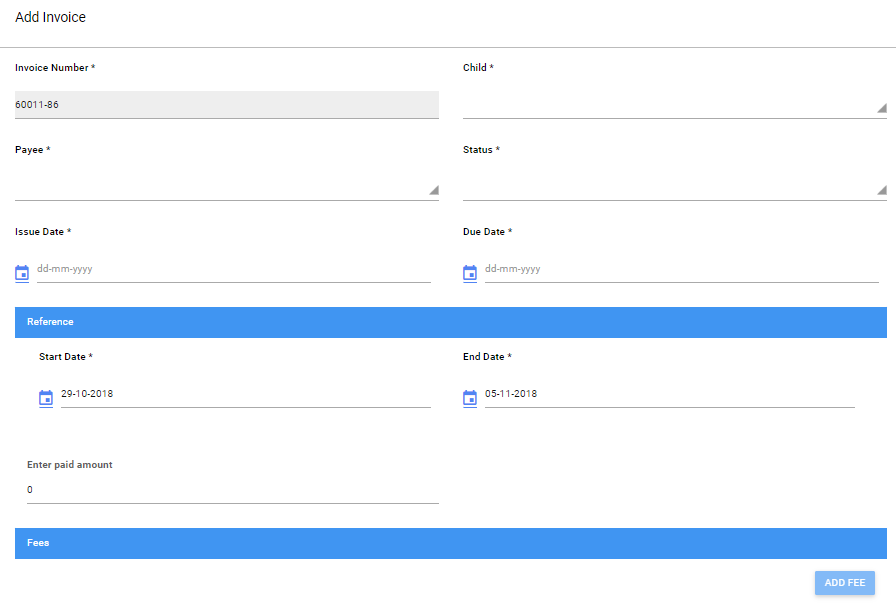
- Select add new from the Invoices report as & fill in the required fields as shown below

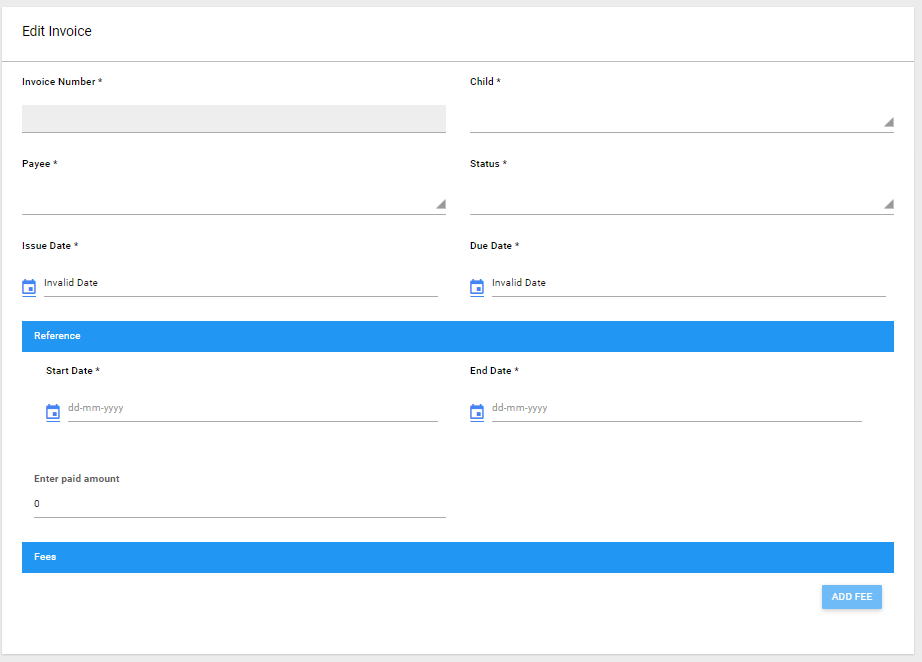
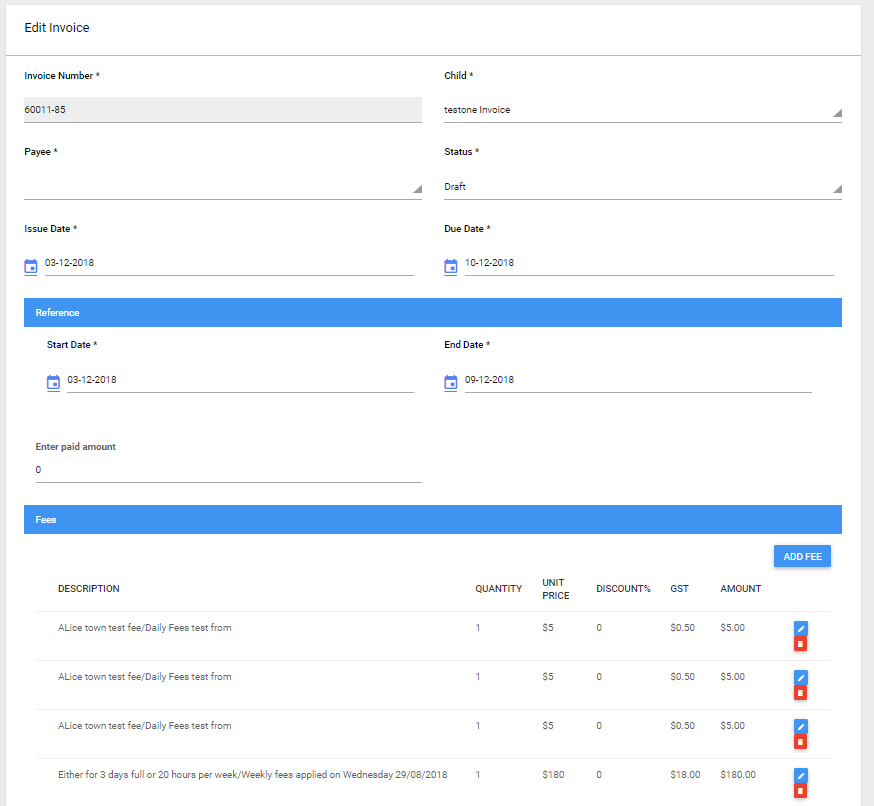
- Select the invoice and click on the edit button from the statement & fill in the required fields as shown below.

6. Viewing invoices
There are two methods for users to view invoices: Invoices for a child & Invoices for your service.
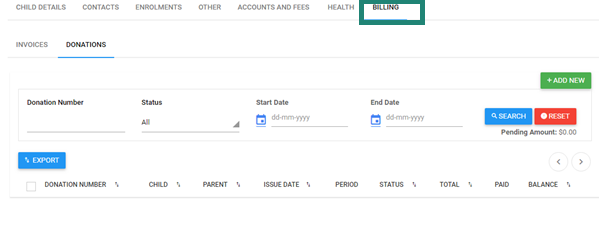
Invoices for a child
- From the Child record select the Billing tab, all invoices related to that child will be displayed here
- The filters can be used to specify a search
- Users will be provided with views & options such as:
- Instantly add new fees
- Reset your search
- Display the pending amount
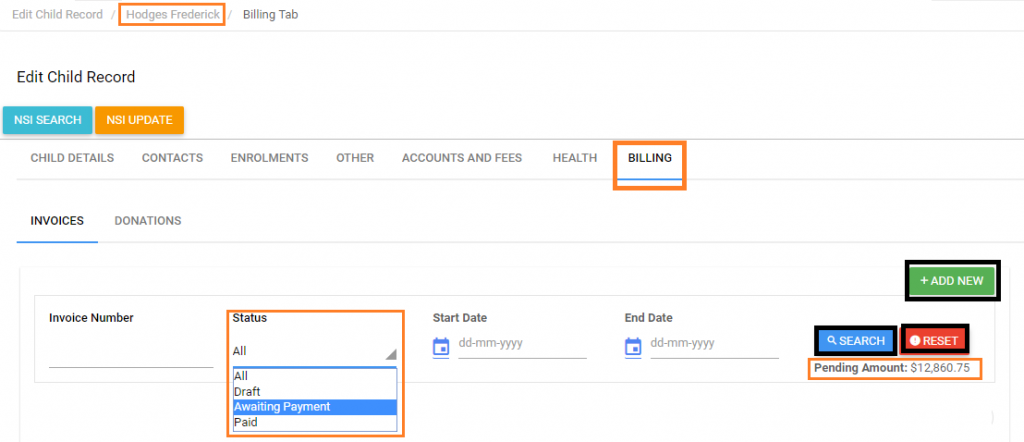
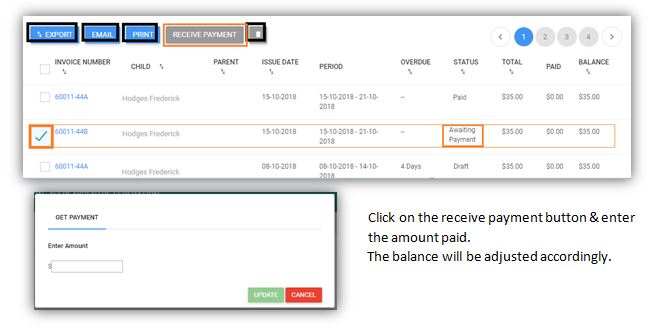
- The invoices are set in 3 statuses after they are created: Draft, Awaiting payment & Paid.
- The checkboxes to the left enable users to perform further actions for the matching invoices. The first check box near the Invoice Number title will select/deselect all invoices on that page.

Users have the option to select one or several invoices by ticking the checkboxes to the left.
- Click on the arrows symbol under the Titles to sort the list for a better view finder.

Depending on the invoices status, ticking a checkbox will produce a grey action button. See below for the following statuses
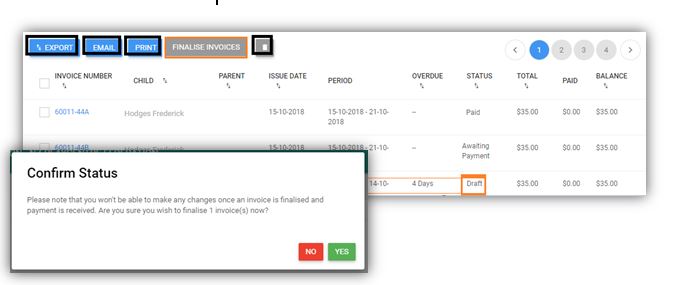
- Draft states this invoice is not finalised and users are able to modify existing fees here.
- Upon selecting this, the invoice users will have the option to Finalise the invoice.
- The system will confirm users action when finalising invoices.
Ticking an invoice with a status in Awaiting payment will enable the Receive Payment button.
Viewing all invoices in your service
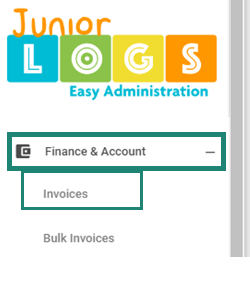
From the menu, under Finance & Account select Invoices.
- Use the search filters to narrow down your results. The arrows symbol below assists the user in sorting columns.
- The most recent invoice will be displayed first.
- View all history & pending items from here.
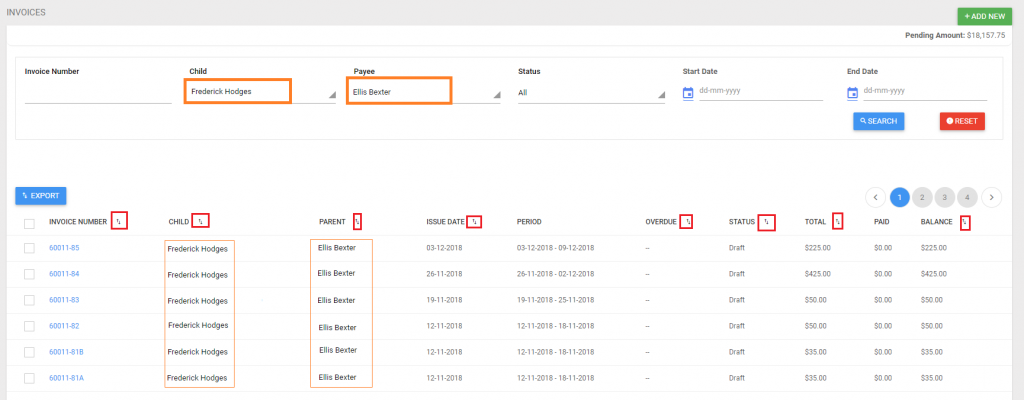
Invoice numbers are unique and they will contain Centre code followed by a number.
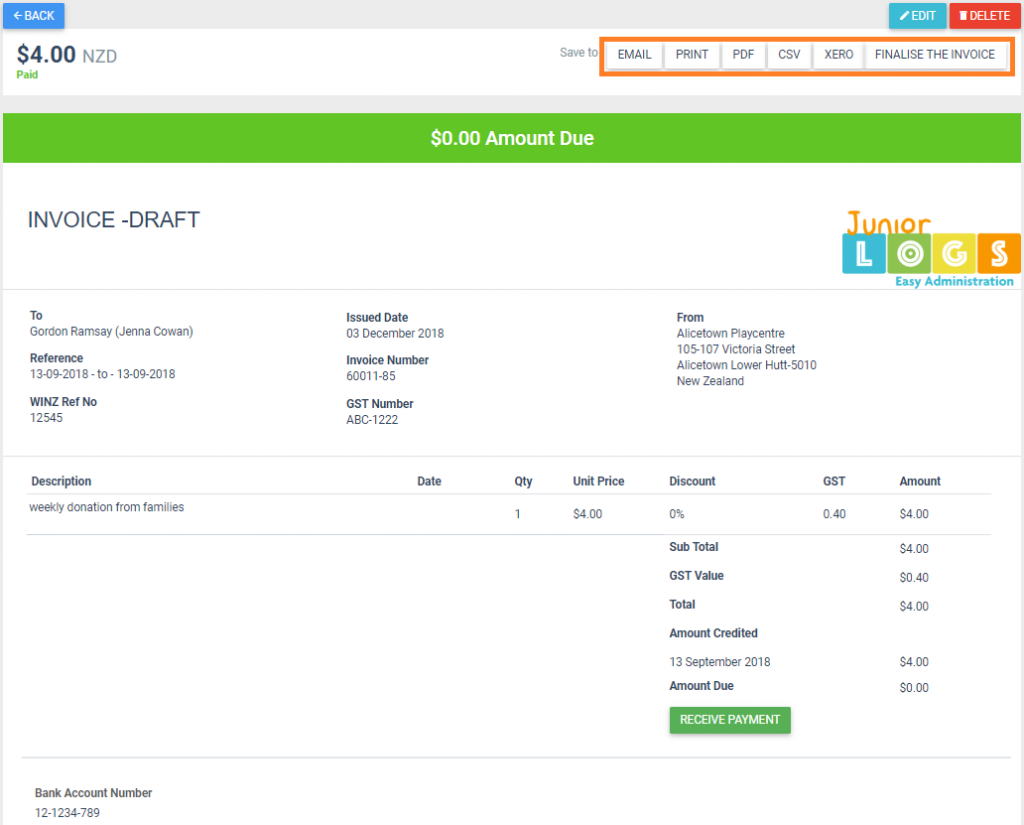
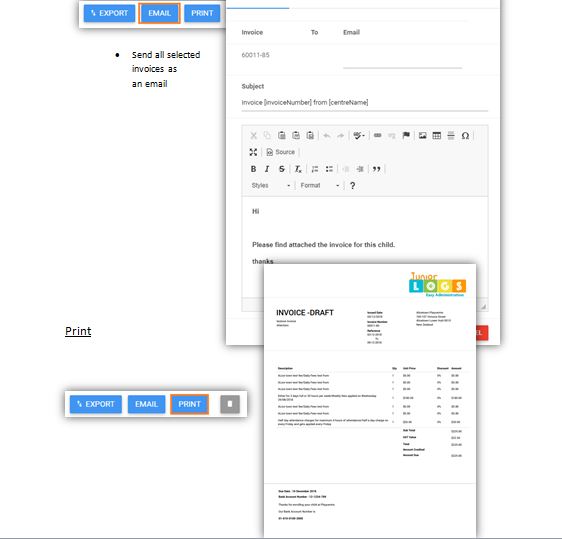
Several options can be made to save a donation request. Email, Print, PDF, Download as a CSV file, send to Xero and finalize the Invoice.
- Users have 2 options to create instant invoices or fees
- Select add new from the Invoices report as & fill in the required fields as shown below.

- Select the invoice and click on the edit button from the statement & fill in the required fields as shown below.

7. Viewing statements
The following options are available for statements
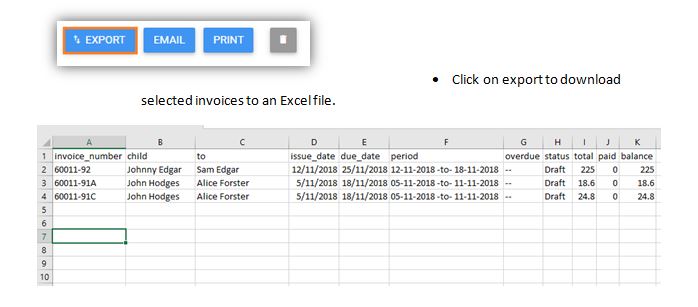
- Export to Excel
Export to Excel
Email