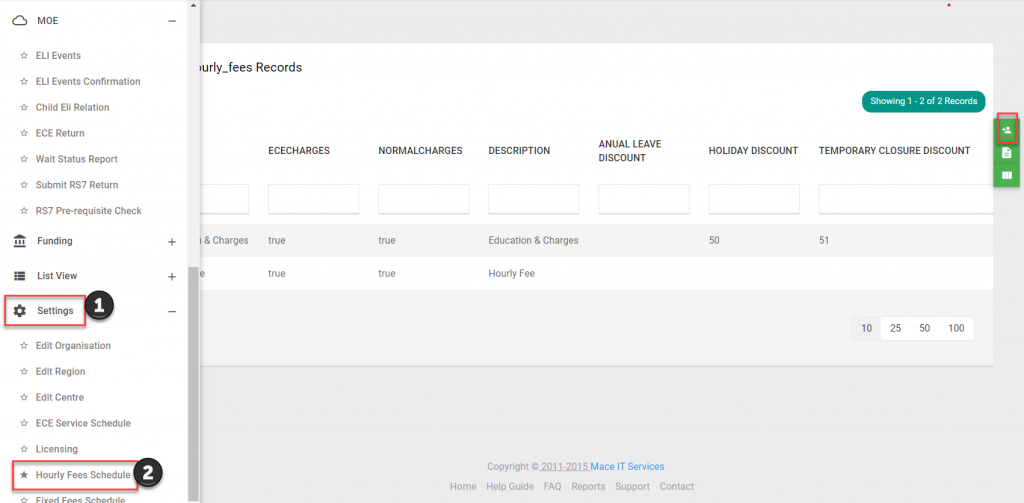
How to Create and Apply Hourly Fees Schedule:
Menu > Settings> Hourly Fees Schedule
- Add new fees schedule – Click on Add new fee icon on right
Hourly Fee Schedule:
- Hourly Fee Schedule : Add Name/ Description/ Select Hours
- Add Minimum and Maximum Charges to be applied on fee
- Hours – Hours are in slots of 25 min. Fees can be applied accordingly
- Charges-Select checkbox, Fees can be allotted for hours in Partly or for the full hour
- 20 Hours ECE – Select the checkbox and put “ZERO (O)” on sixth hour
- Holidays & Temporary closure Discounts can also be added and applied with fees
- Late Charges: Late charges can be added to Fee schedule and applied on respective fees for the child
- Save and continue

Apply Hourly Fees:
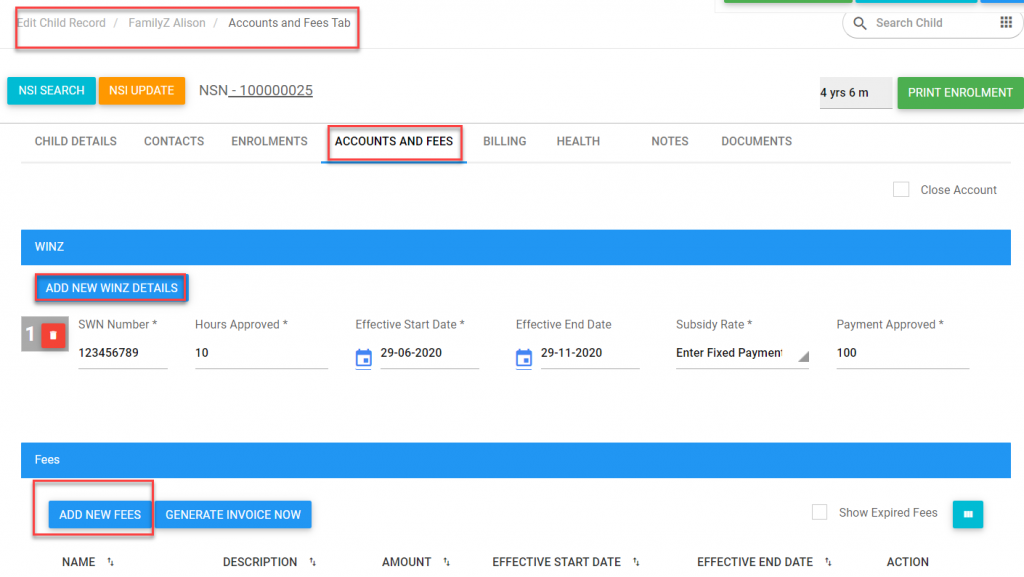
Menu > List View> Children
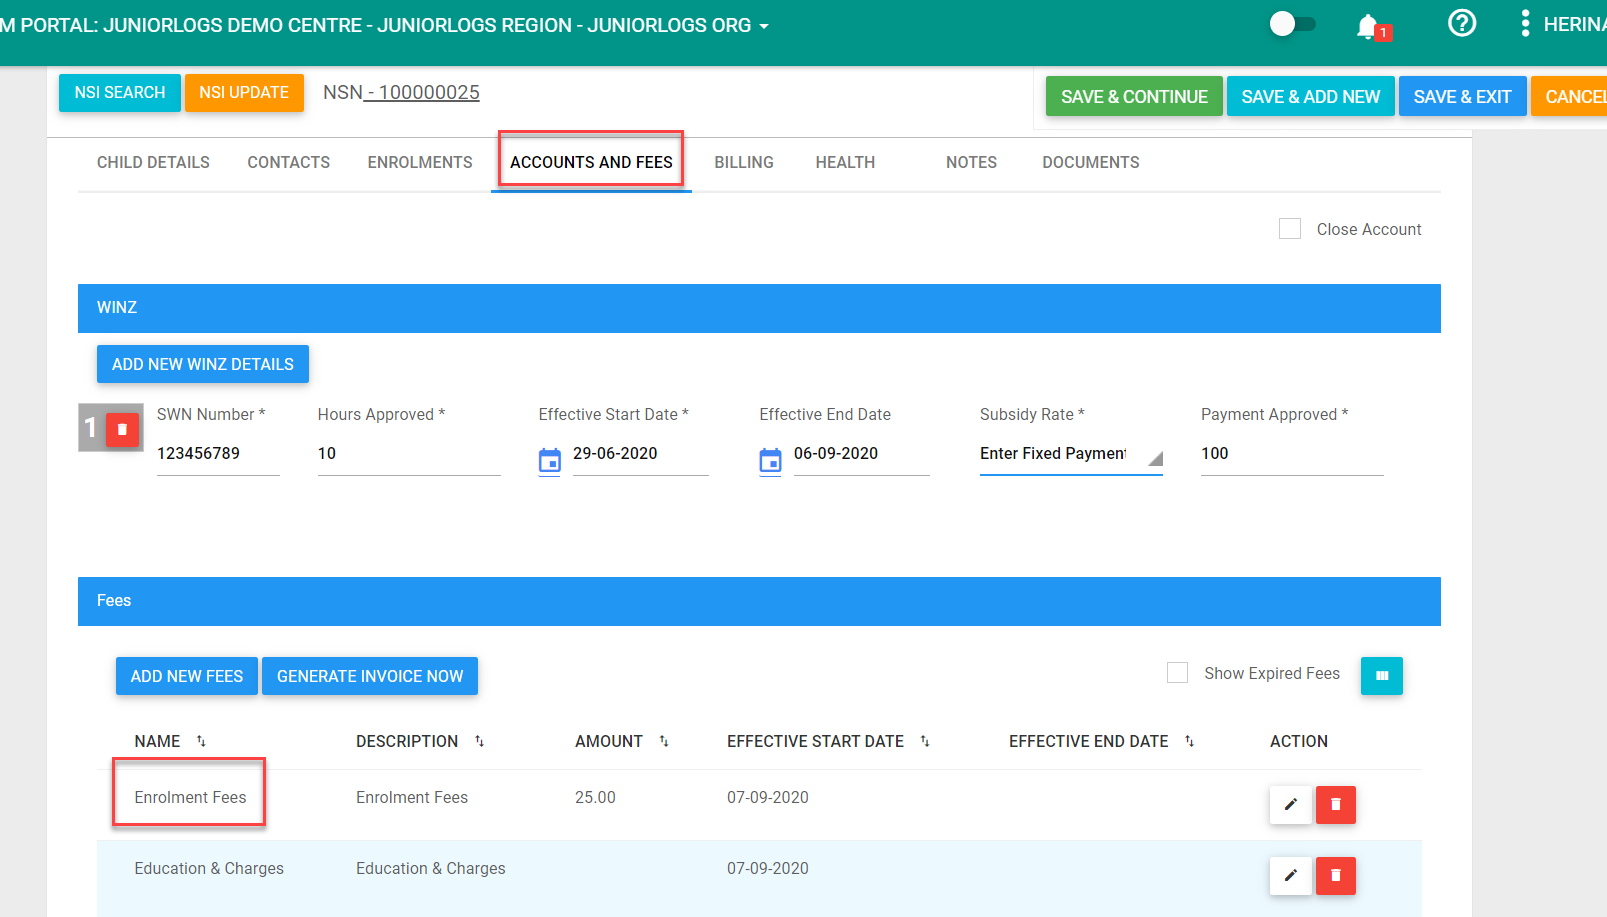
Select Child> Under Accounts and Fees tab
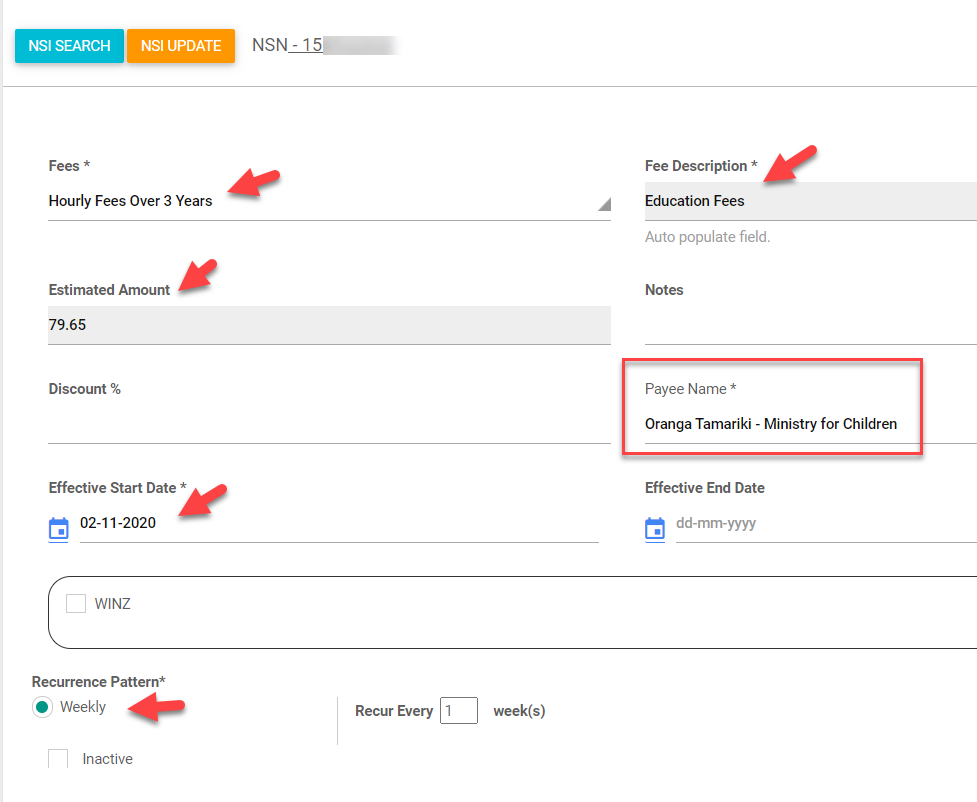
Add New Fees> Add Hourly Fees
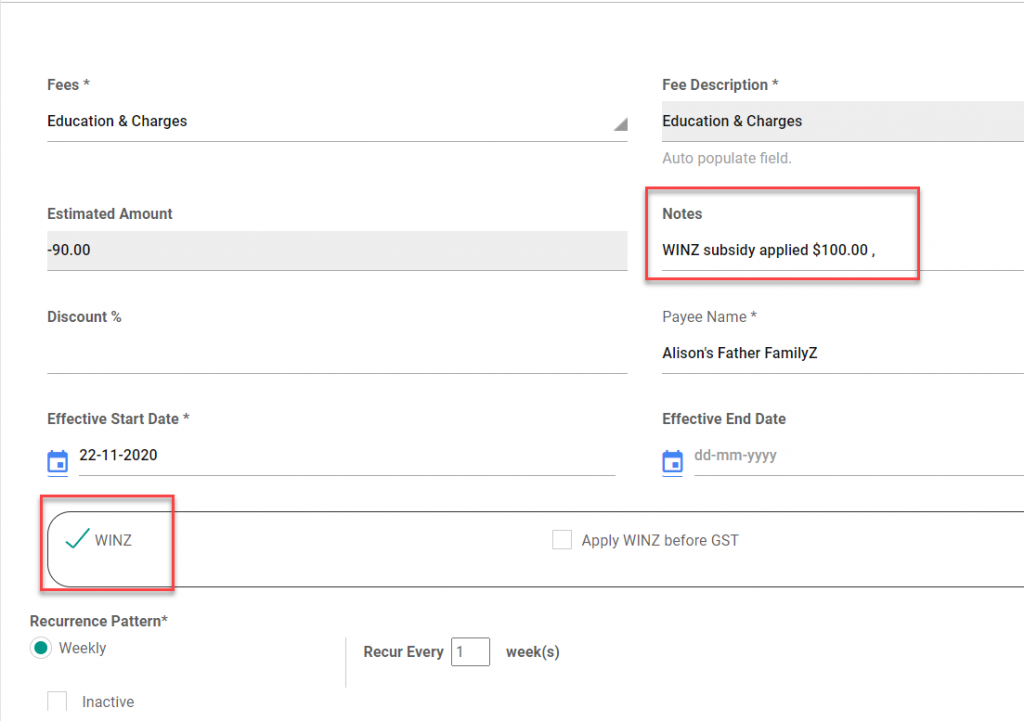
- Apply Hourly Fees schedule from dropdown under “Fees”
- Add discount, if any
- Select WINZ checkbox to activate WINZ in the fee schedule, if available
- Notes: Gives description of WINZ and discount applied on the fee .
- Select Payee from dropdown- WINZ / Parent
- Select Effective Start and End Date to create fees for invoice cycle
- Recurrence pattern: Weekly/Once
- Save and Continue
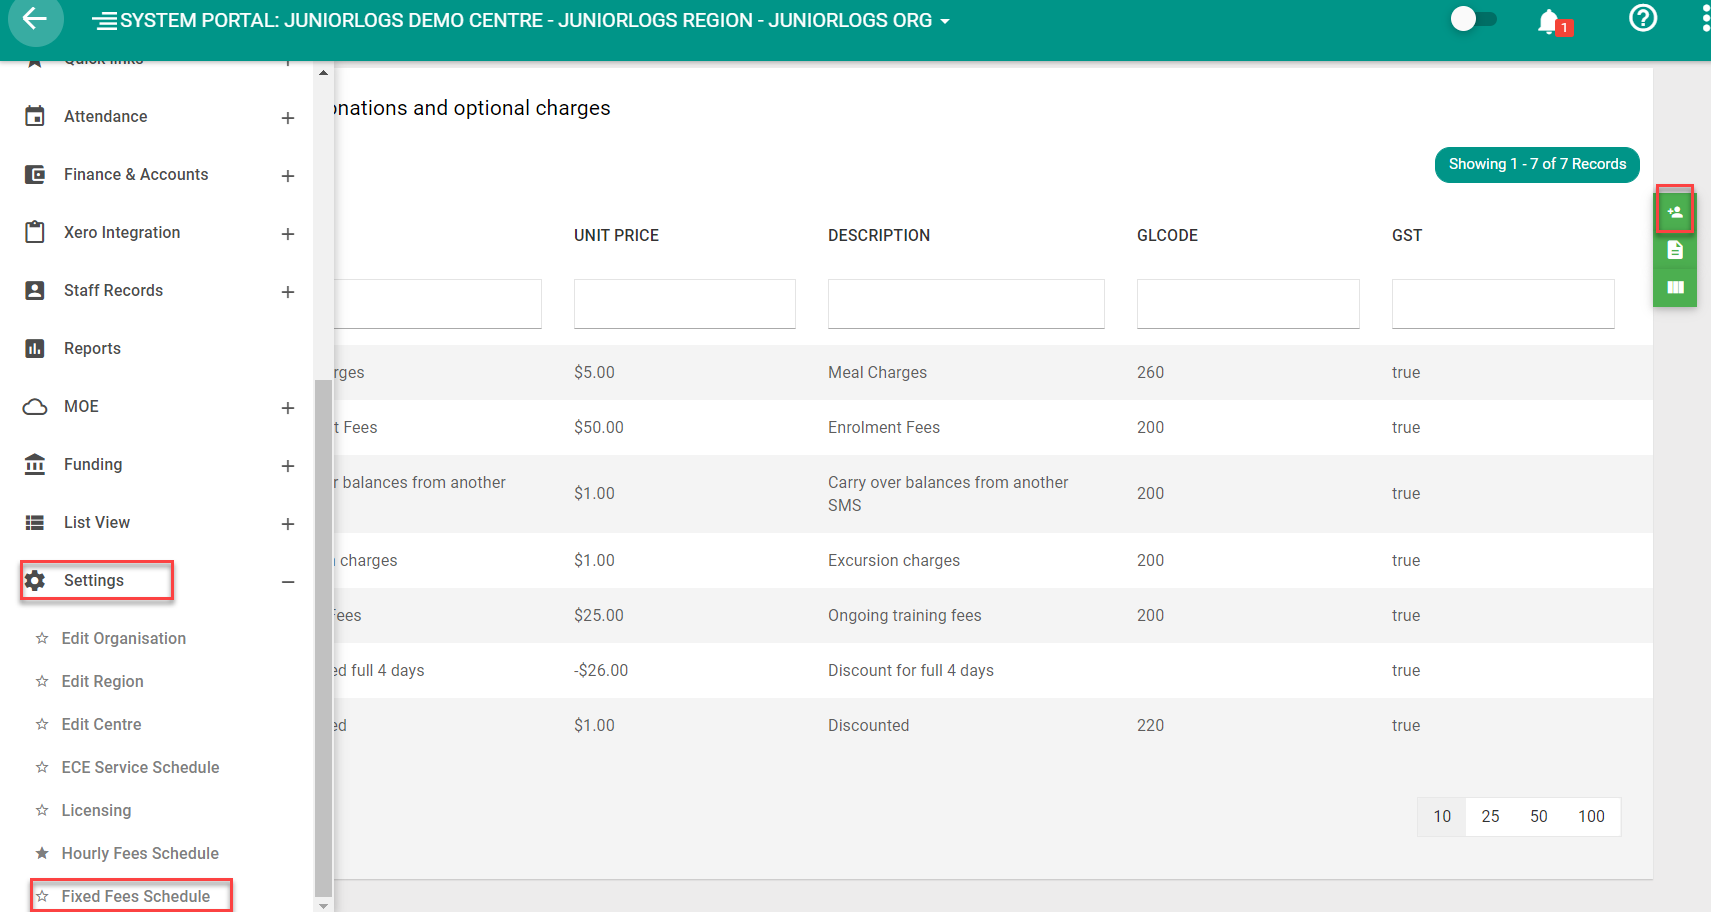
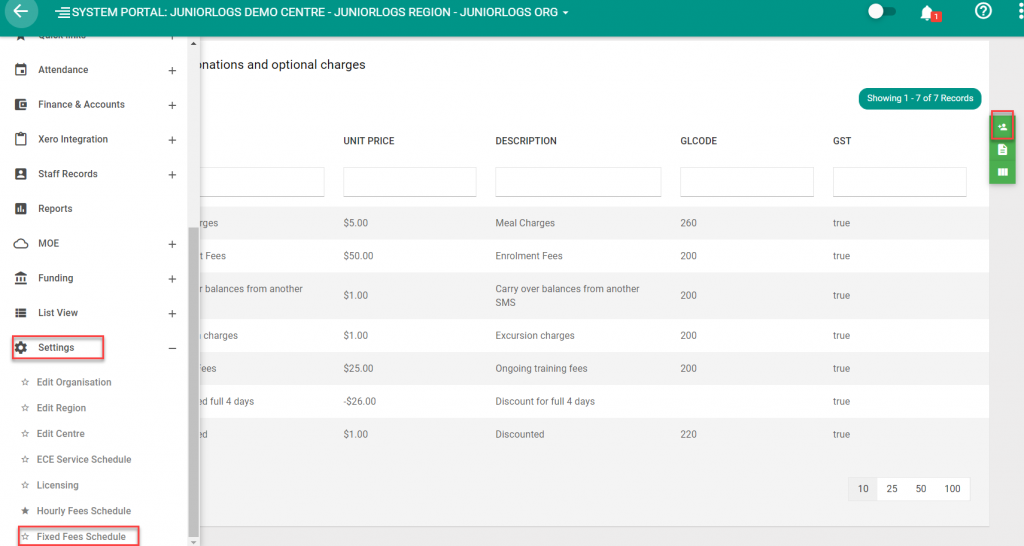
How to Create and Apply Fixed Fees Schedule:
Menu > Settings > Fixed fees Schedule
Add new Fixed Fee Schedule – Click on Add new fee icon on right
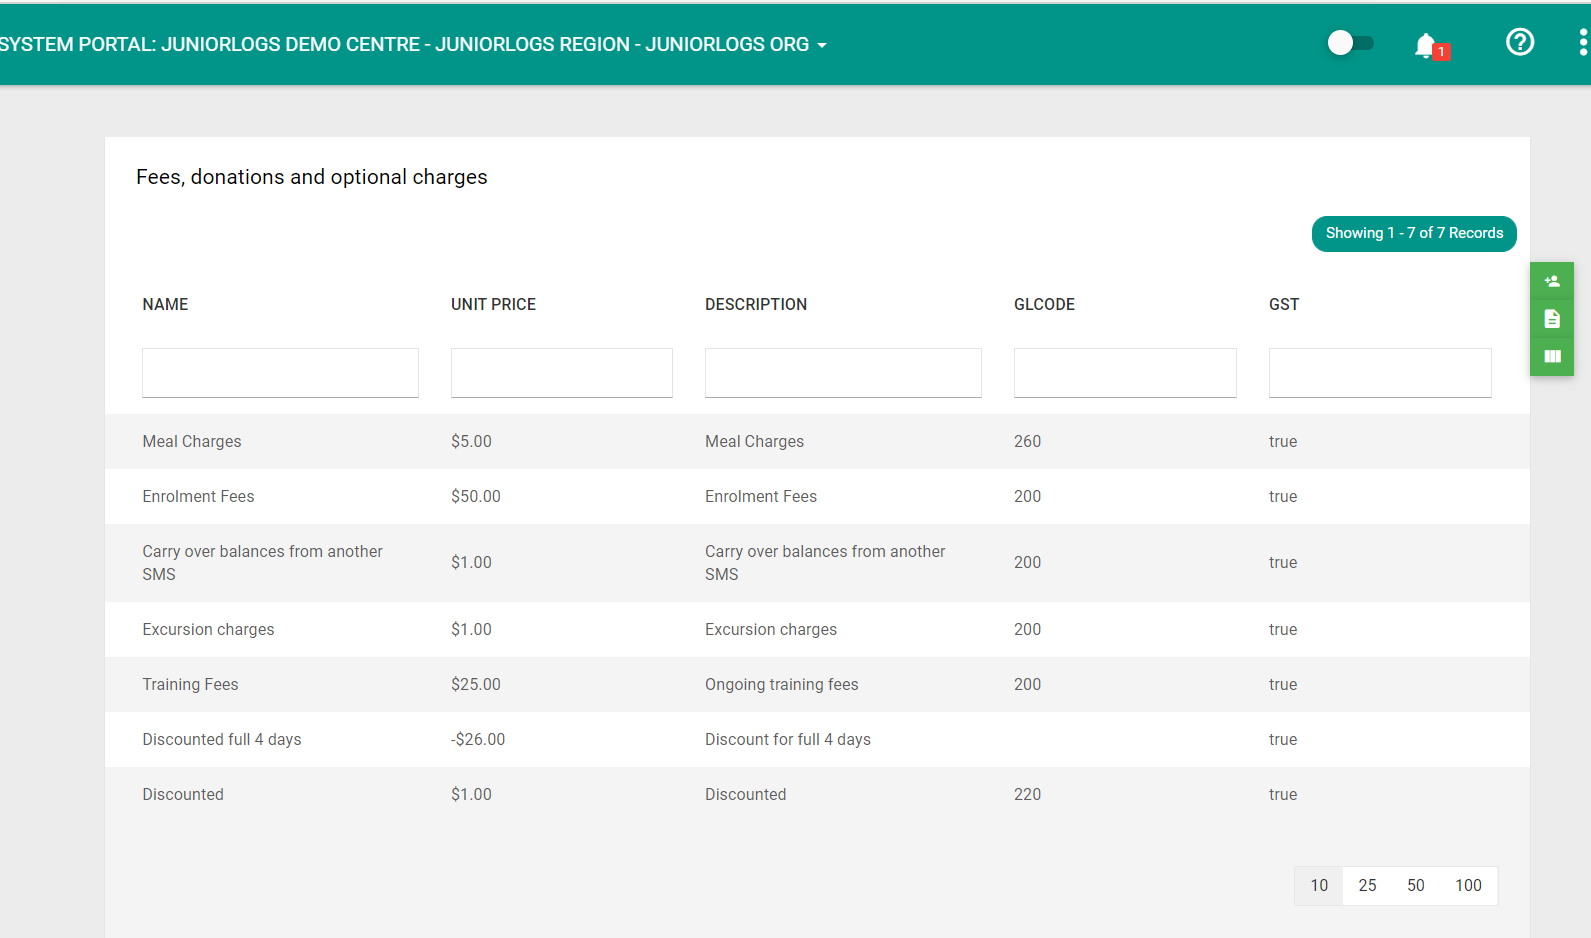
- Fixed Schedule Fees is mostly used Once
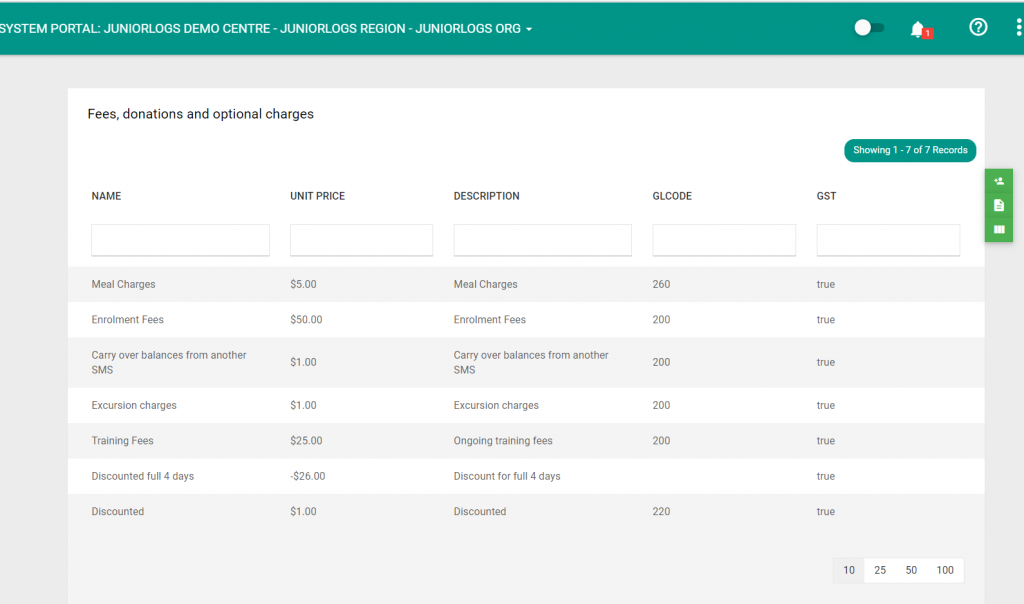
For eg; Enrollment fee, Meal charges, Carryover Balance, etc.
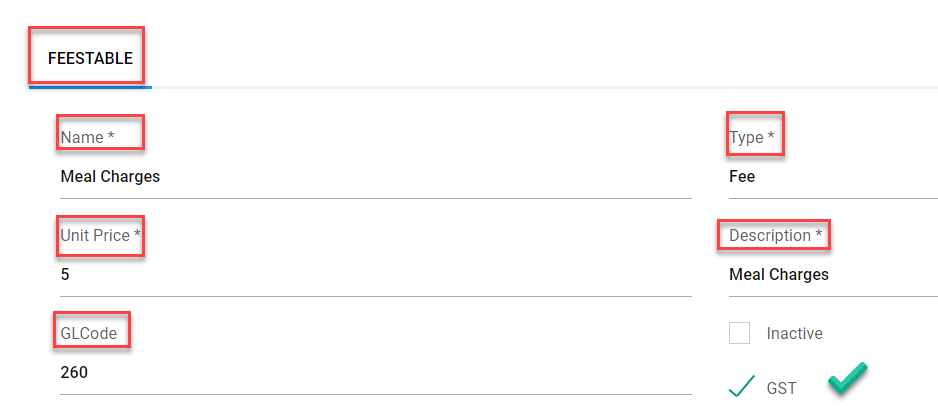
Fees:
Add all values to the fields as required
Unit price : Amount in Dollar “$”
GST: Activate the checkbox to apply GST on fee >> Save and continue
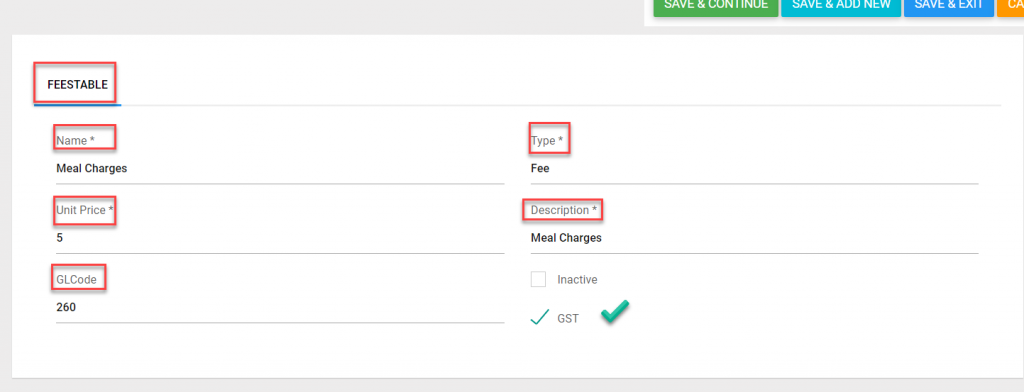
Fees Table:
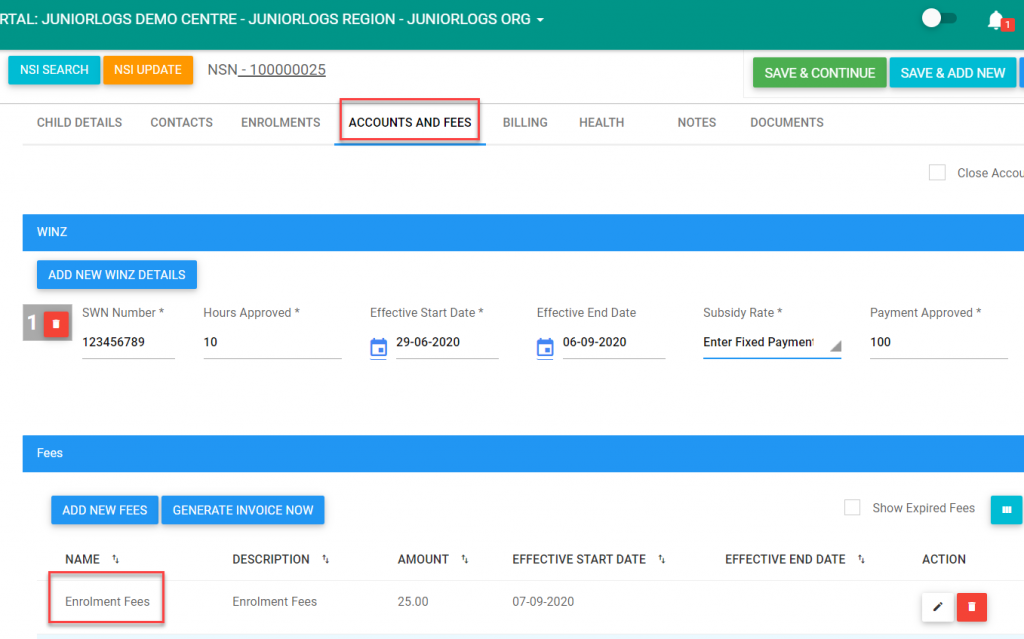
Applying Fees Under Child Record:
Menu>List View> Children
Select child: Under Child record > Select Accounts and Fees Tab
Add Fixed fees : Add New Fees> Apply fee> Save and Continue
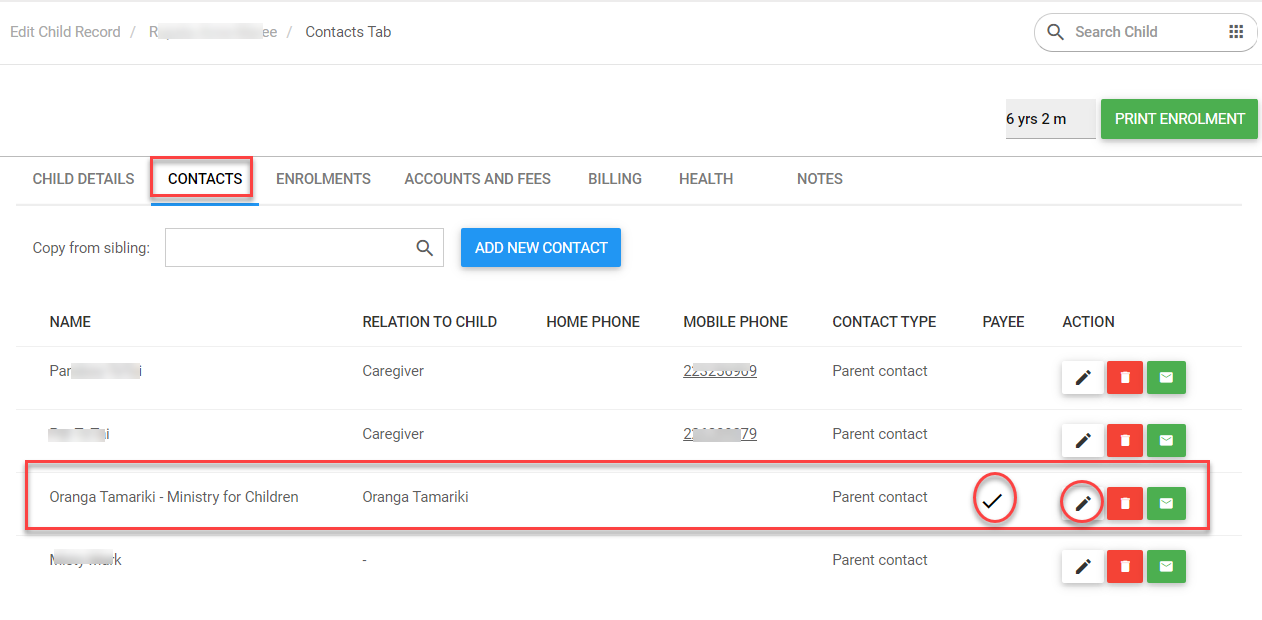
Assign Oranga Tamariki as payee to accounts:
- Navigate to the Contacts tab
- Select the Oranga Tamariki – Ministry for Children to assign as a Payee.
- Turn the Payee checkbox ON
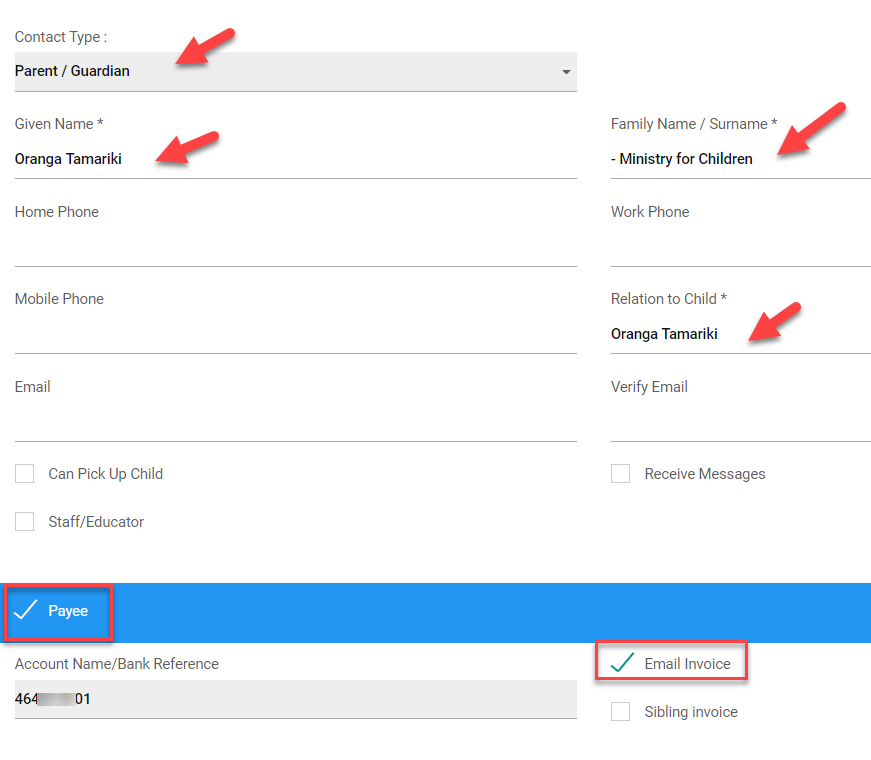
After marking the contact as Payee, the system will allocate an Account number or what we call as a Bank Reference number.
This is important and it needs to be shared with Payee(s) so that they can use the exact code towards their fee payment.
This Bank reference is also required when you want to use Xero integration or when you would like to import the bank statements for the system to pick up correct payee ids and to provide correct payee mapping information against each payment received.
- To enable sending email invoices to the payee, the Email invoice check should be selected.
- If you would like to assign this payee as a common parent for sibling children, then “Sibling Invoice” check should be selected.
- To make sibling invoices work, you should make sure that the same contact is marked as Payee for all the siblings and “Sibling Invoice” is also selected under each child’s record.
How to add Oranga Tamariki as payee to fee:
Under Accounts and fees tab > select fee > under payee field > Select Oranga Tamariki > Save& Continue