How to go from new enquiry to Online Enrolment
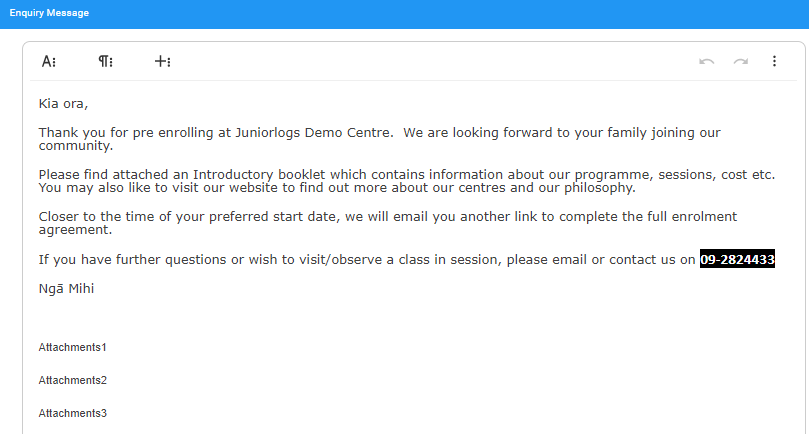
An acknowledgement message should be configured/set up for your new enquiries. This could be thanking the prospective parents for their message and you could also send them the information pack or your fee schedule and policies.
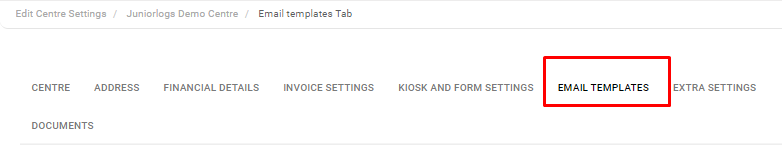
To set up this message:
Menu > Settings > Edit Centre > Email Templates tab > Enquiry Message section
New Enquiries received by the centre are automatically saved under:
Menu > List View > New Enrolment Enquiries

- Enquiry Status: New Enquiry
- New Enquiry Status have 3 option Tabs:
- Mark Waiting
- Send No Vacancy Email
- Send Enrolment form
New Enquiry to Send Enrolment form:
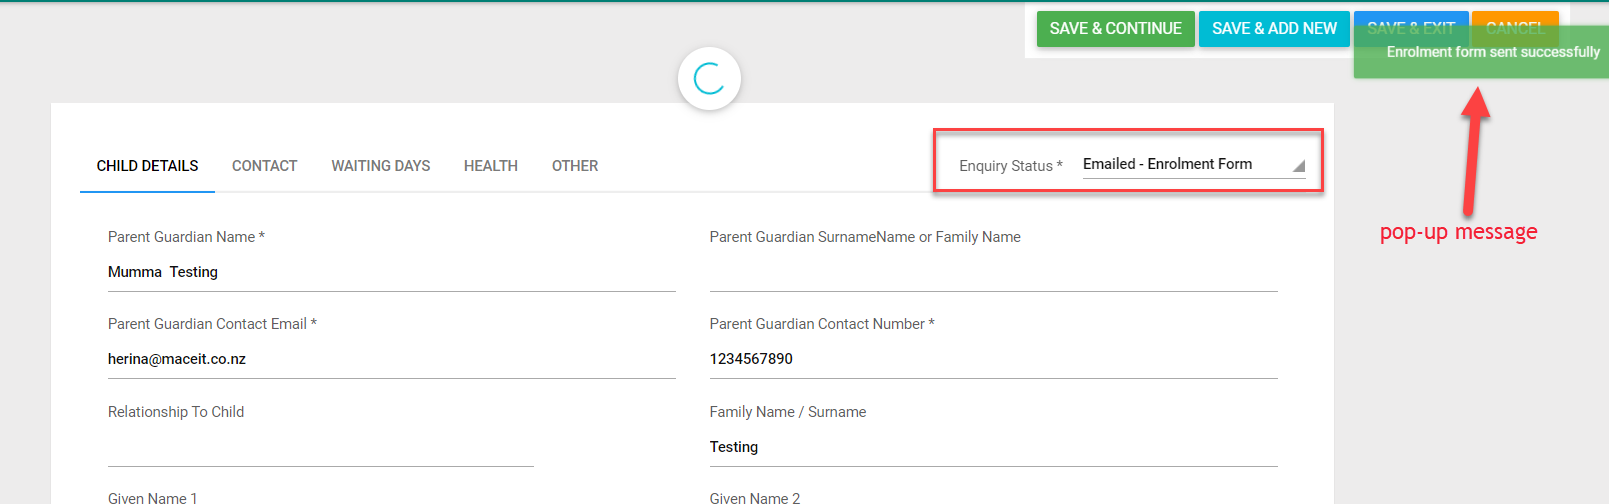
Select Send Enrolment Form: When you select Send Enrolment Form, it will send the online enrolment form link to the parent’s email address and you will receive a pop-up message on changing status.
The email sent to parent’s email address after selecting the Send Enrolment form button can be configured/edited under:
Menu > Settings > Edit Centre > Email Template tab > Send enrolment Form template section
You can edit the message as required.
 After the online enrolment Form will be filled out and submitted, it will be sent to the Centre’s email address.
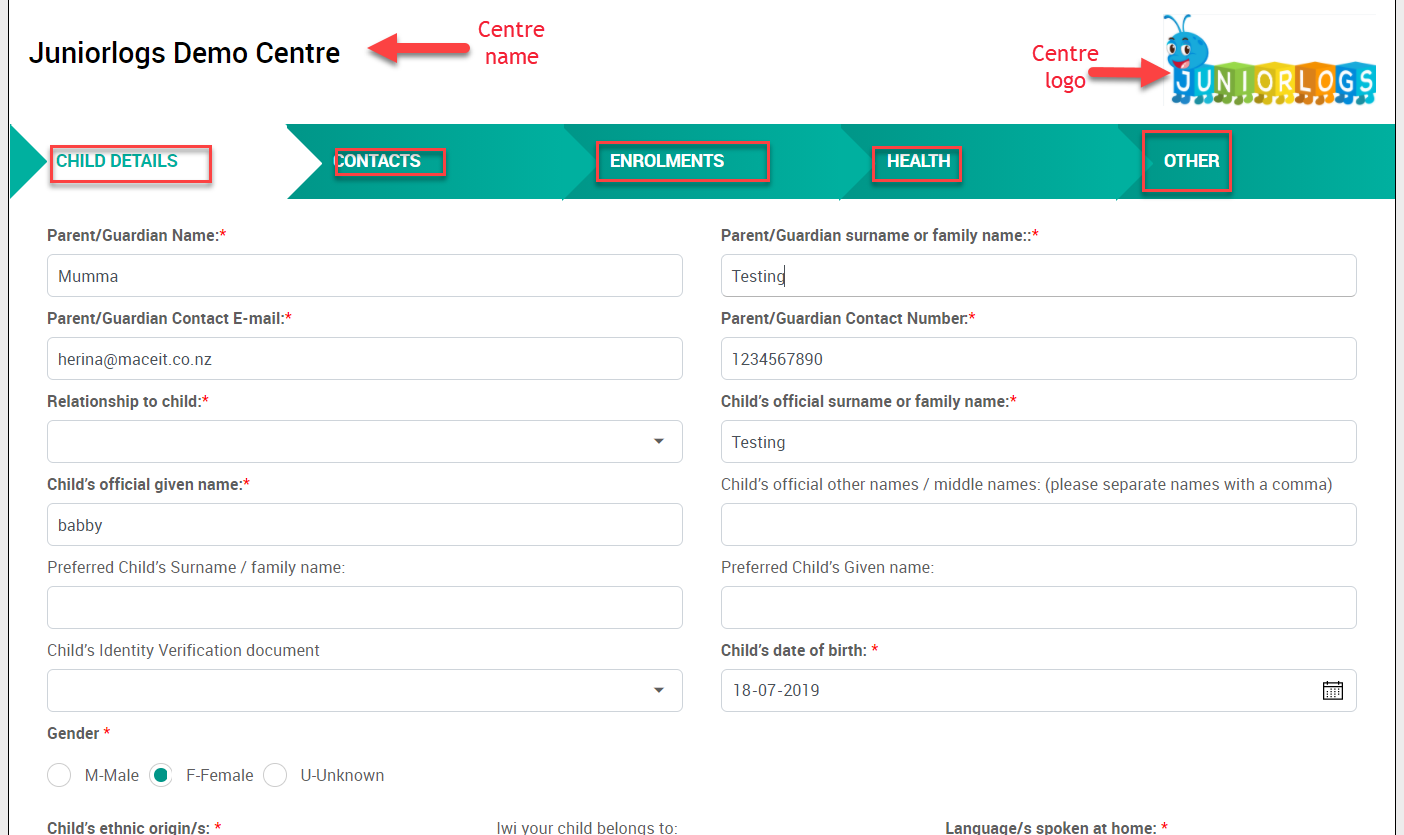
- The enrolment form has multiple tabs to be filled out mandatorily by parents.
Once Parents submitted the enrolment form they will receive auto-generated email.
This can be edited as desired.
Menu > Settings > Edit Centre > Email Template tab > Full Enrolment Message template

Process of Enrolment:
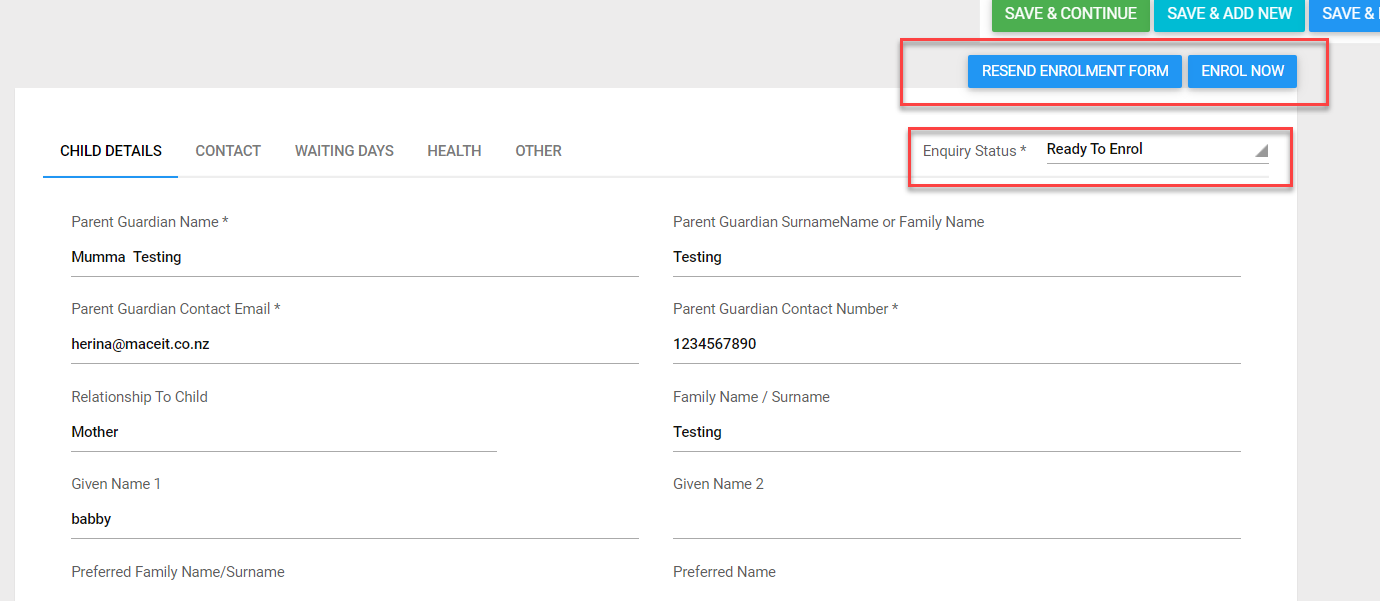
Once enrolment form is received, the enquiry status changes to Ready To Enrol and it will have 2 actions:
- Enrol now – to proceed with the child enrolment. Select Enrol now > Save and continue.
- Selecting Resend enrolment form will resend the same enrolment form if needed.
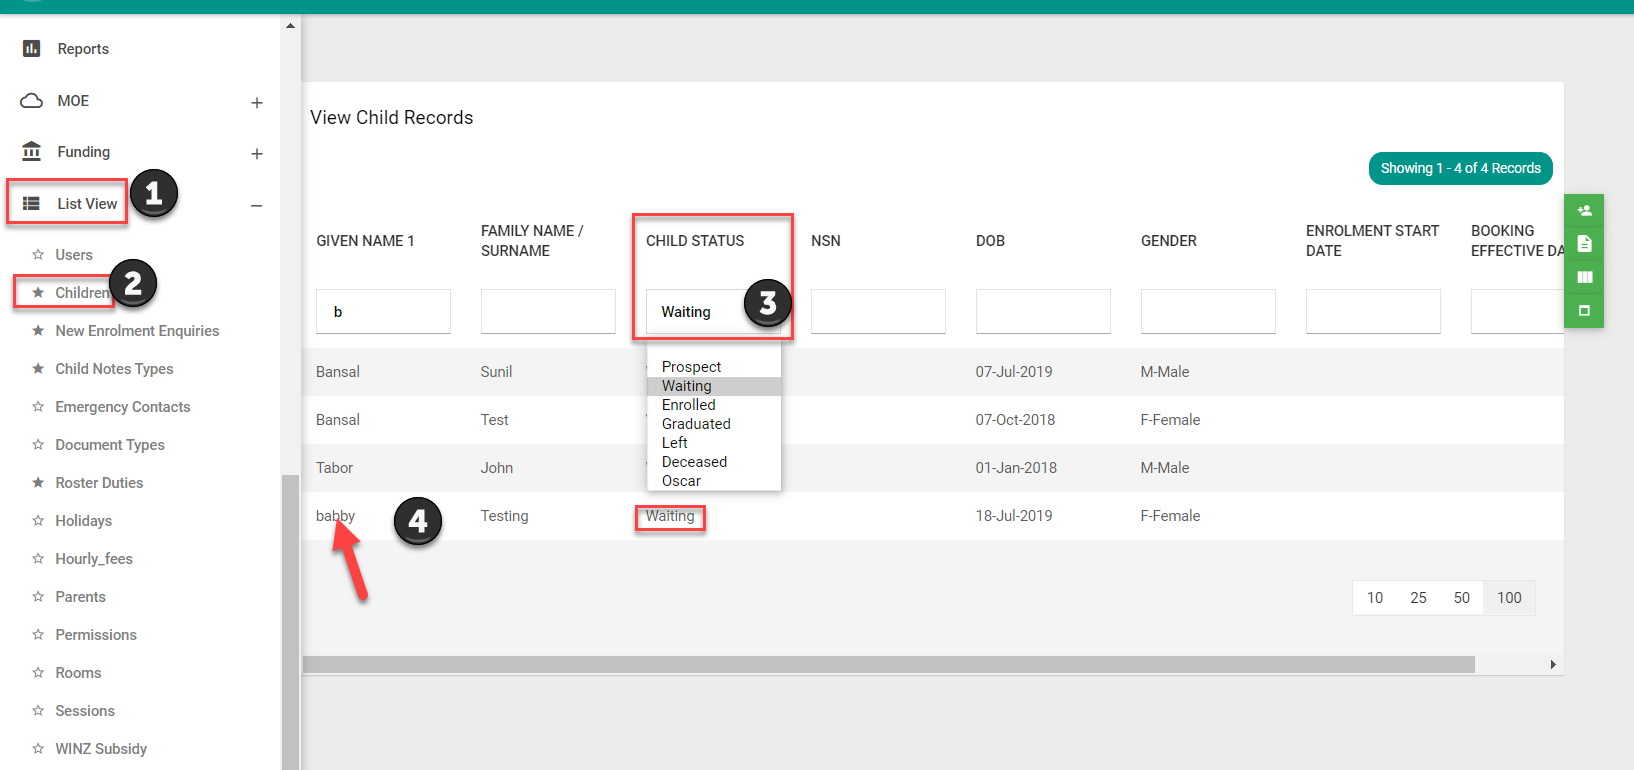
Once you select the Enrol Now button, the child’s record will automatically be saved on Waiting status under List View > Children.
- Select the child record by double-clicking on it to access the record.
2.
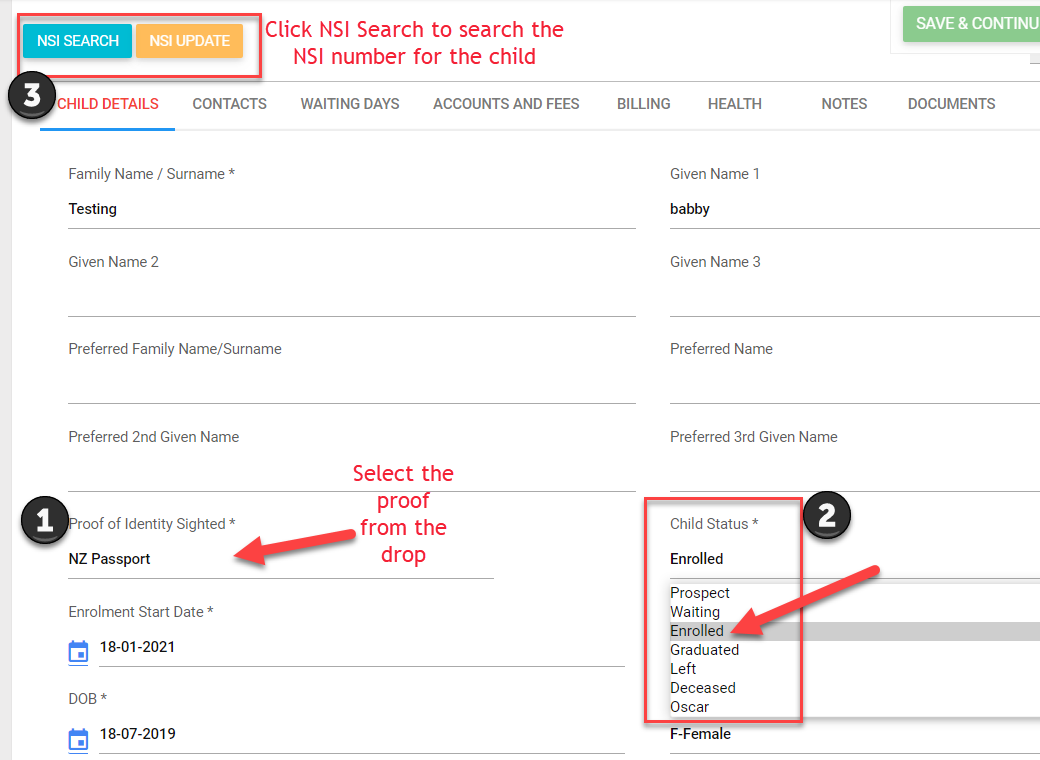
- Enter the Proof of Identity from drop down as submitted by parent.
- Select status as Enrolled. This will enable NSN-related actions at the top
- Select NSN search to search child’s NSN number
OR
- You can also select NSN Update to update the NSN number if the parent has given already
- Check all details and document submitted > Save and continue .
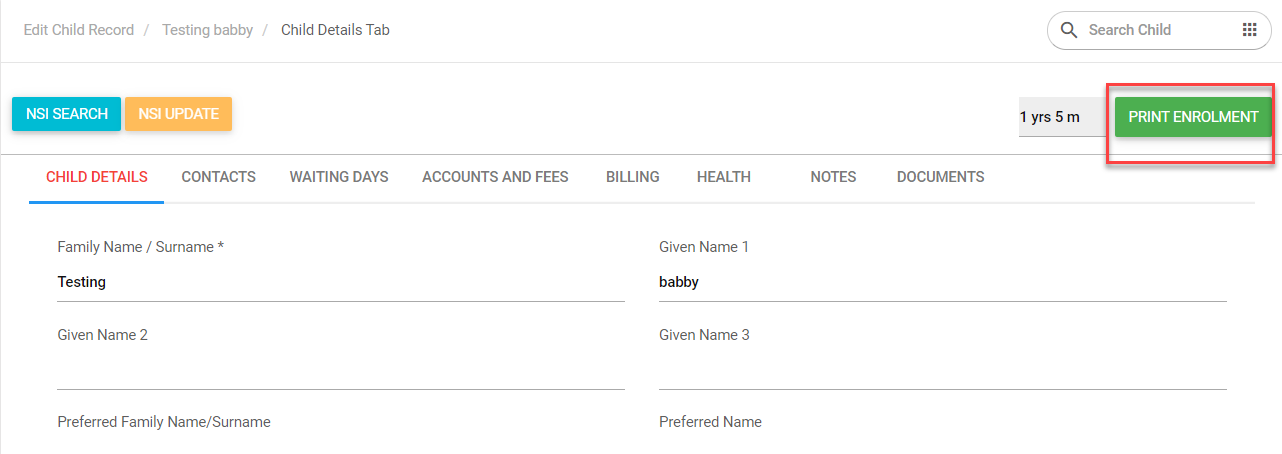
The child is now under enrolment status:
You can click the print enrolment button to have it printed then signed by parents.
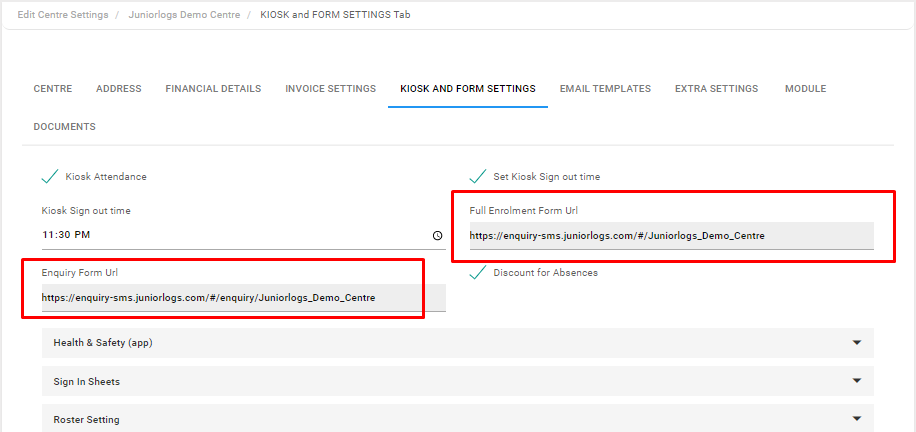
Links to your online enquiry form and online enrolment form can be found under:
Menu > Settings > Edit Centre > Kiosk and Form Settings tab > Enquiry Message section
Important notes:
- While enrolling the child, if any of the contact information has any error/s, you will be able to edit the contact info by clicking on the Contacts tab and correct any error/s and proceed.
- While enrolling the child, an error message will be shown if there are any errors on the enrolment details entered by the parent/s. You will be able to correct the errors and proceed.
- If any required vaccination details are not filled in by the parent/s, the system clears the details and allows you to proceed and enroll the child without showing any errors. You can always edit the details later.
For any unwanted enquiry records that you need to get rid of, please send the details to the support team and we will help you tidy them up.