How to mark roll/attendance:
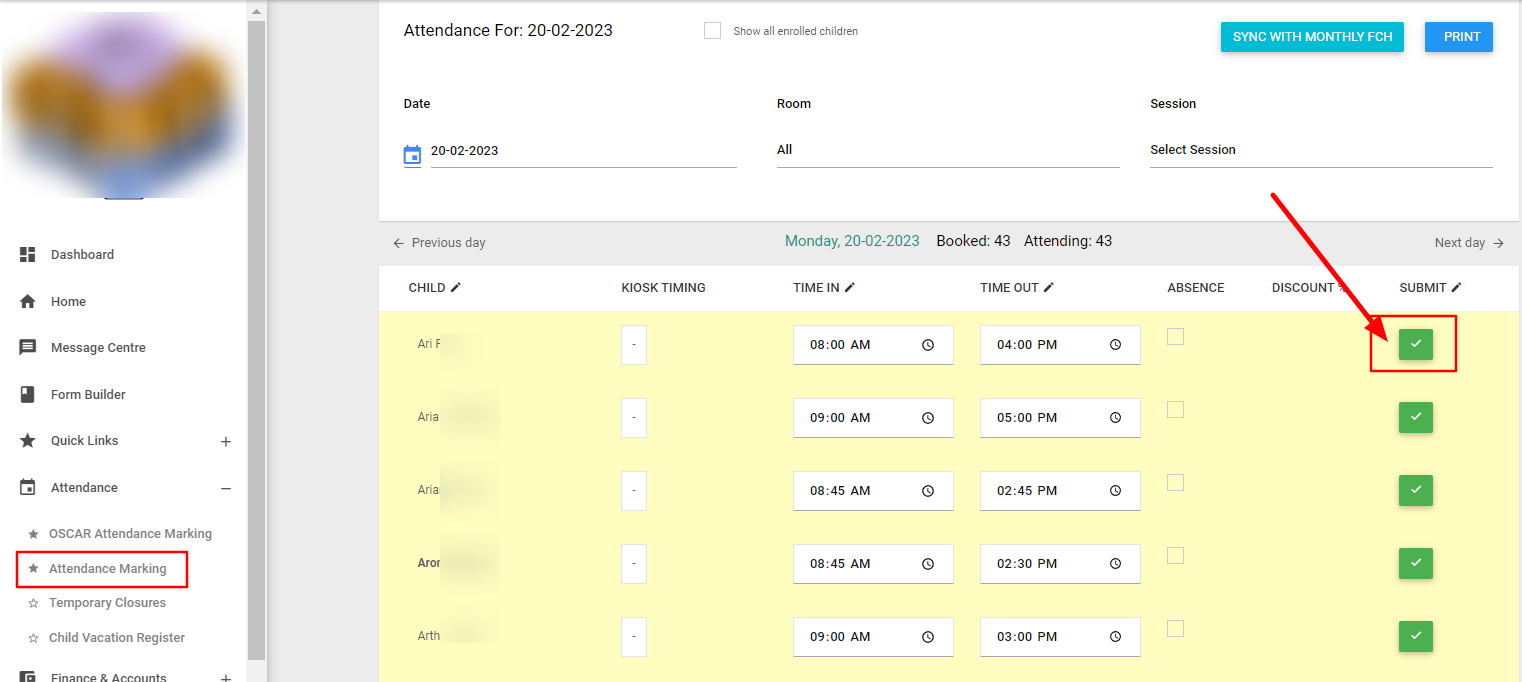
From the left Menu, go to Attendance > Attendance Marking

The page will update all booked children for the day.
- Select Date, Room and Session
- To sort the children’s list: Click the pencil icon beside the Child header and select your preferred sorting.
- To edit: The pencil icon allows to edit the categories as required
- To change timings: Timings can be changed from Time In/Out field
- To save : Click green check to save and submit
- To delete : Click on the edit pencil button then click the red bin icon to delete.
- To show all enrolled child: Tick the checkbox at the top to view all enrolled children for the day.
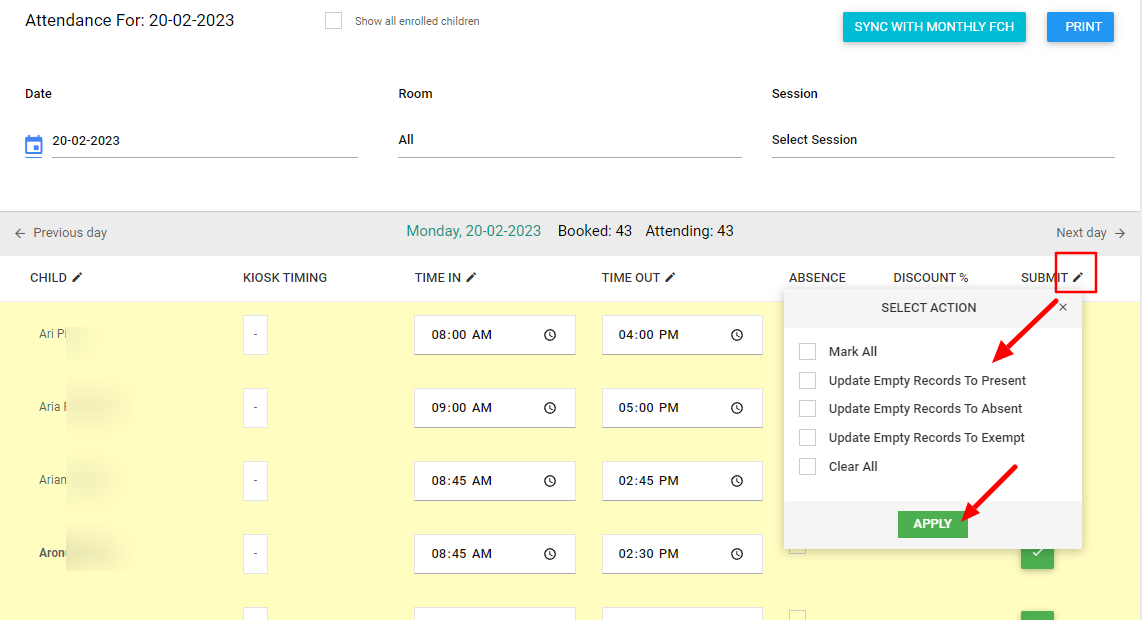
- Submit header : Click on pencil icon for Bulk marking > Apply

- If attendance is already marked, it will show the pencil icon and we can edit if needed and submit.
- To mark absence : Click on the edit pencil icon, then click the checkbox under the Absent column and submit.
- Kiosk timings : It can be copied over to the Time In/Time Out to finalize attendance by clicking on the arrow and select Submit.
How to remove “Remarks” column from the attendance marking sheet layout.
1. Settings > Edit Centre.
2. Click the Enquiry and Enrolment tab and go to the ‘Sign In Sheets’ section.
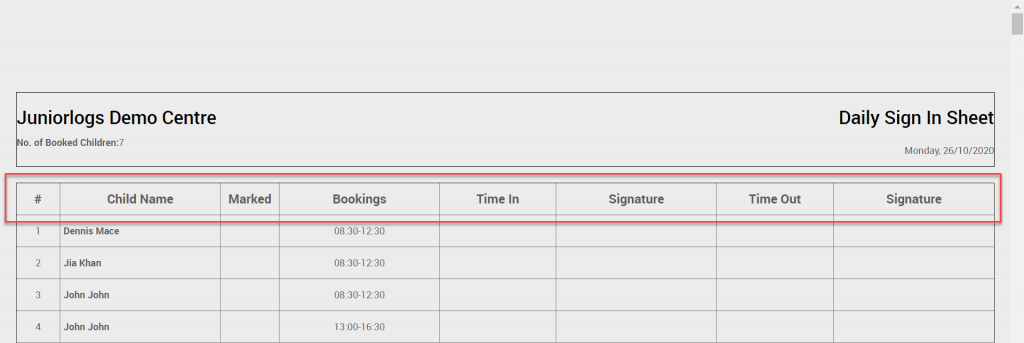
3. Enable the option ‘Remove Remarks column’ and save the settings. This gives you wider columns for better readability and parent data input.

